
Setting Up FMOD Studio To Import Custom Sounds
Before you can use custom sounds in your Workshop mods, you’ll need to install and set up these files inside a FMOD Studio project. This guide will go over all the steps necessary from installing the software all the way to getting your FMOD banks with custom sounds inside Unreal Engine.
1. Downloading and Installing FMOD Studio
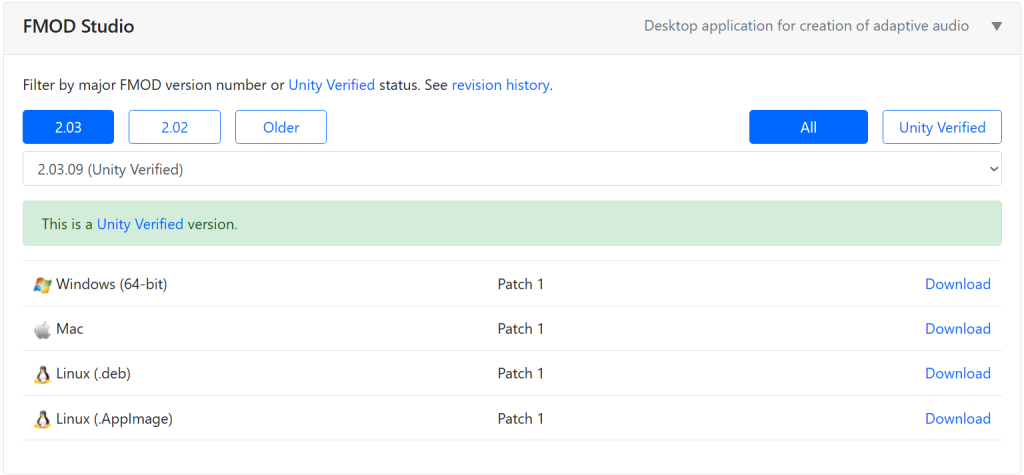
Rivals 2 utilizes FMOD Studio 2.03.09 as its audio engine. Before you can add custom sounds, you’ll need to download the FMOD Studio desktop application, available here. You might be prompted to create a free account before you can see this page.
Once you’ve created your account and logged in, go to the FMOD Studio and find the download link for the version 2.03.09. Download and install.
2. Opening the Workshop FMOD Project
The workshop files contain a streamlined version of the same FMOD Studio project we use in the base game; this project can be used to create custom banks. Once you’ve installed FMOD Studio, open the project and follow these instructions:
- Launch FMOD Studio 2.03.09.
- Click the Open Project button.
- Locate your Workshop directory and open the following project file:
/YourWorkshopFolder/FMOD/rivals2/rivals2.fspro
3. File Naming Conventions
Inside the FMOD Studio project we provided an automation script that does most of the heavy lifting for you and simplifies the whole process outside Unreal a fair bit. This automation script relies entirely on your audio file names to determine how to route and process the sounds. Your files must be properly categorized using prefixes, and they must follow a strict naming convention outlined below.
General Format
The naming convention that all custom audio files should follow before running the automation script looks like this:
[prefix]_[character_or_item_name]_[move_name]_[variation_number].wav
- Use snake_case: Use underscores to separate words. Spaces will make the script skip the file.
- Character or Item Name: This name is used to define which folder, buses and banks the events should be routed to.
- Move Name: The Move Name field can be as big as needed as long as everything is separated by underscores. (e.g. fstrong_active, fstrong_active_loop)
- Variation number: Always end with an underscore followed by a two-digit number (e.g., _01, _02). This allows the script to group multiple variations of the exact same sound into a single FMOD event. (Even if your sound does not have multiple variations, make sure to still add “_01” to the end of the file name to ensure the script runs smoothly)
Prefixes List
The script recognizes the following four prefixes to determine how to categorize and process your audio. We will break down the specifics of each category below.
- sfx_ (or snd_) : Character sound effects and hits.
- sfx_item_ : Sound effects for custom items.
- vo_ : Character voice lines, exertions, and grunts.
- announcer_ : Custom announcer lines.
3.1 Character SFX (sfx_ or snd_)
What it is: Catch-all category for character sound effects, including move perform sound effects, intro, loops and everything else that isn’t voice-over you want to add to your character.
Naming Structure: sfx_[character]_[move]_[number].wav
Examples: sfx_zetterburn_fstrong_01.wav, sfx_armando_intro_01, snd_danfornace_fspecial_active_loop_02
Special Modifiers:
- loop: Add “loop” anywhere in the move name to automatically flag the generated event as a looping sound.
Example: sfx_armando_fspecial_loop_01.wav - intro: Add intro to the move name to apply the same processing designed specifically for intro sounds as we use for the base cast.
Example: sfx_armando_intro_01.wav - Hits weak, medium and heavy: Hit sound effects are routed completely different in FMOD’s mixer and use a completely different processing, to ensure your custom hits go through the same path, make sure your move name field includes the word “hit” in the move name. The script will also look out for the words “heavy”, “medium” and “weak” to know the strength of the hit and route it accordingly. If it can’t find any of those, it’ll be considered a medium hit.
Example: sfx_kraggson_hit_rock_heavy_01.wav
3.2 Item SFX (sfx_item_)
What it is: Sound effects for custom items, these are routed differently and need to be in separate banks so they use a different prefix.
Naming Structure: sfx_item_[itemname]_[action]_[number].wav
Example: sfx_item_turnip_bounce_02.wav
Special Modifiers:
- loop: Add “loop” anywhere in the move name to automatically flag the generated event as a looping sound.
Example: sfx_item_turnip_roll_loop_01.wav
3.3 Character VO (vo_)
What it is: Voice lines, grunts, and vocal exertions for the characters.
Naming Structure: vo_[character]_[action]_[number].wav
Example: vo_kragg_fstrong_01.wav
Special Modifiers:
- VO events don’t have any special modifiers and will ignore any modifiers previously mentioned.
3.4 Announcer (announcer_)
What it is: Use this to create events for custom announcer calls for your workshop character. Currently Workshop does not support custom announcer packs but you can still add a line specifically for your character. Using this prefix will route it to the correct place.
Naming Structure: announcer_[character]_[number].wav
Example: announcer_armando_01.wav
Special Modifiers:
- Announcer events don’t have any special modifiers and will ignore any modifiers previously mentioned.
3.5 Examples
snd_armando_fstrong_01 (Character SFX)
sfx_armando_fspecial_loop_01 (Looping Character SFX)
sfx_armando_intro_01 (Character Intro SFX)
snd_armando_hit_01 (Medium Hit SFX)
snd_armando_hit_fire_heavy_01 (Heavy Hit SFX)
snd_armandogun_active_01 (Item SFX)
sfx_armandogun_charging_loop_01 (Looping Item SFX)
vo_armando_hit_heavy_01 (Character VO)
vo_armando_effort_weak_01 (Character VO)
announcer_armando_css_01 (Custom Announcer line for CSS)
4. Importing Audio Files To The Project
Once your files are correctly named, you need to import them into the FMOD project’s asset pool before running the script to generate events.
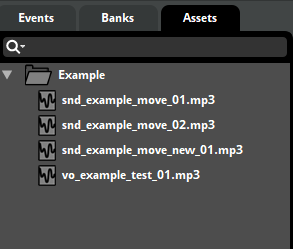
- Click the Assets tab on the top-left or go to Window/Audio Bin to open the Assets Browser
- It is highly recommended to create a sub-folder here for your specific character or mod using the right click and selecting “New Folder” to keep things organized.
- Drag and drop your renamed .wav files from your computer directly into the Assets browser to import them into the project.
5. Running the Automation Script
Once you have renamed your files and imported them to the project, you’re finally ready to run the automation script. It reads your file names and creates all the FMOD events, folders, mixer buses and banks necessary following the exact steps to replicate the routing and processing we use in the base game.
- In the Assets browser, select all the audio files you wish to implement. (You can select multiple files at once).
- Navigate to the top menu bar and click on Scripts.
- Select Rivals2 Modkit > Auto-Implement Workshop Audio.

- If the automation script runs successfully, a dialog pop-up will appear detailing everything that was created.

6. Adjusting Created Event Volumes
While the script handles all the complex logic, you might still need to go into your events and adjust their volumes to sit well in the game’s mix.
- Navigate to the Events browser and locate your newly created events.
- Click on the Event you want to edit to open it in the editor.
- Locate the Master Track (usually sitting in the deck in the bottom of the screen).
- Adjust the primary volume fader up or down to achieve the desired mix level.

7. Building and Importing Banks In Unreal Engine
Once your audio is implemented and your volumes are set, you must compile the FMOD project into banks (data files that contain all audio events and compressed audio) so Unreal Engine can read them. Since we are creating custom banks, Unreal Engine doesn’t automatically detect them, so we created a tool that imports your custom banks to the correct place.
- Navigate to the top menu bar and select File > Build (or simply press F7).
- Navigate to the top menu bar and click on Scripts.
- Select Rivals2 Modkit > Deploy UGC Banks to Mod Folder.
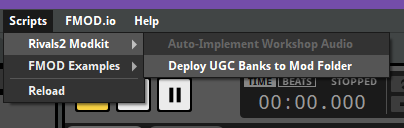
- A dialog box will appear. Follow the instructions in it to select a mod-id folder where the banks will be sent to in order to be accessible inside Unreal Engine.

- After selecting the correct folder, select the banks containing the sounds you want to add to that mod and click Deploy.

- If you followed all the steps in this guide correctly, your banks are now in the right place and the events containing your custom sounds should be ready to use the next time you open the modkit.