
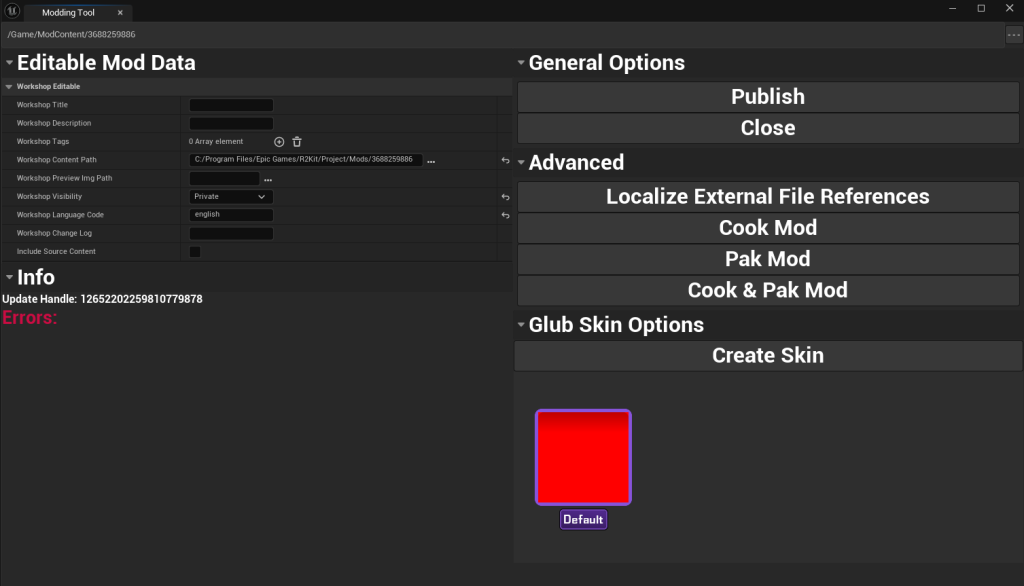
Note: There is no need to publish your mod until you are ready to share it or test it privately on steam.
Once you are ready to publish your mod, ensure all the correct information is populated in the Editable Mod Data section of your mod. This is the data that will be pushed to Steam to set the display settings on the Steam Workshop page. (NOTE: DON’T change the Workshop Content Path)
Once this data has been set, click the Publish button. This will start the cook and publish pipeline for your mod. Do not cook your content separately or outside of this publish button. Do not shut off power or close the workshop during the publishing process, this first time you publish a mod expect wait times of around 20 or more minutes. Subsequent publish times will be quicker for smaller edits to the same mod.
For more details on what this looks like, refer to the Modding Tool Overview Section.
If the mod finishes publishing correctly the Steam window should come to the foreground and automatically navigate to your mod’s workshop page.
If the publish process is interrupted the data in Unreal may be lost and you will need to recover your mod before you can continue working on it.
To Recover your mod data:
- Close Unreal Editor
- Move the folder r2kit/project/save/modpublishedbackup -> ModContent/[ModId]/UnrealAssets
- Delete ModContent/[ModId]/PublishAssets if exists
WARNING: If you close the terminal window while publishing, your mod will be published to Steam in an empty state.

You will need revert to the previous version of your mod in Steam, and then begin the publishing process again.
Note: Once your mod is published the working directly will start cleaning up any temp files and the modding tool will still be displaying a loading bar while this is occurring.
Next Steps
Now that you’re ready to start working on your own mod proceed to the Character Creation Guide
If you run into any trouble be sure to search the documentation or check out the Known issues and Troubleshooting page
For model references check out the Character Reference Downloads Page