
ROA2 characters use a specific set of Texture assets to define various features of a model’s surface like color, shading or outline thickness. Some of these are standard and used in many games like the Base Color and the Normal map. Others like the ORMS map and Color Mask textures are more unique to ROA2.
ROA2 uses this set of textures for all character materials. Not all textures are required, you can choose to omit any textures and even disable their use in your Material Instances in Unreal.
Textures are image files mapped to your character’s UVs, if you have not unwrapped your model’s UVs yet you will need to perform that step first. It is important to be familiar with UVs and the unwrapping process before proceeding.
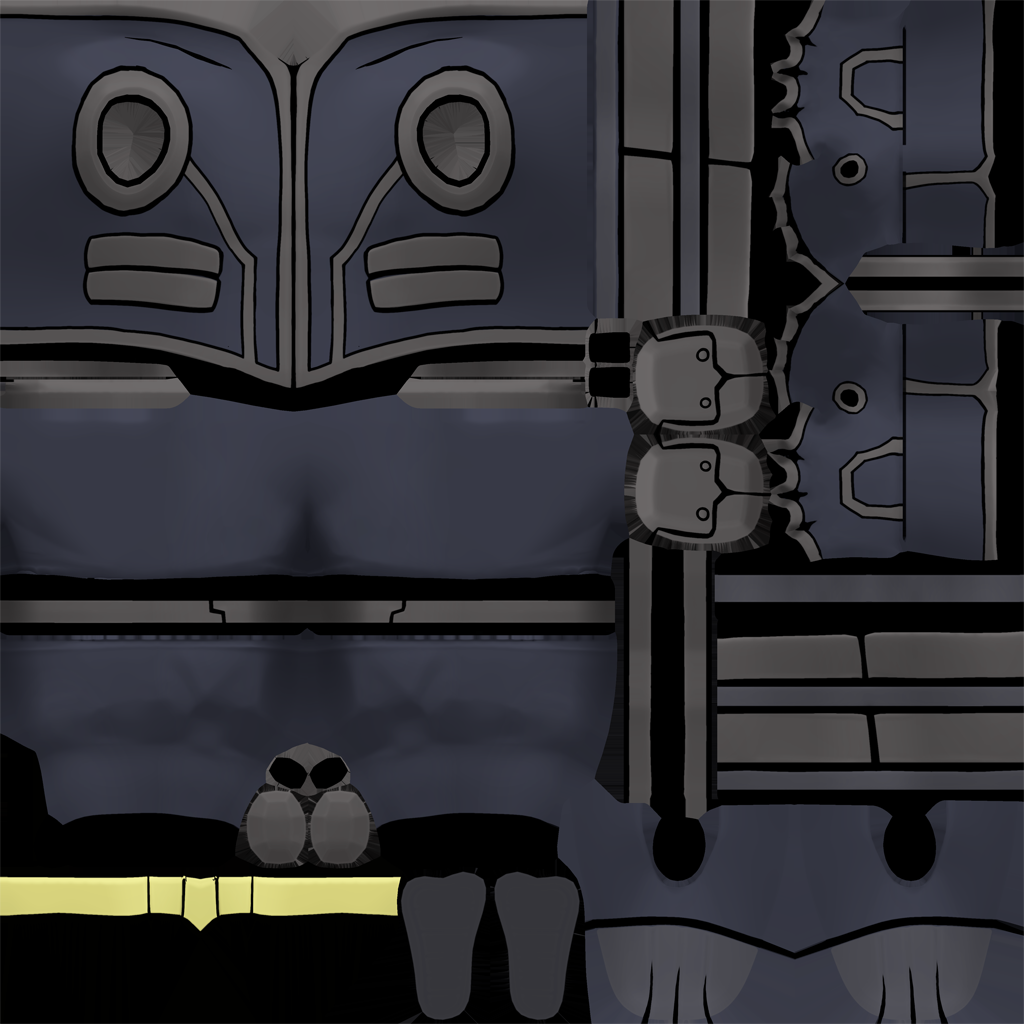
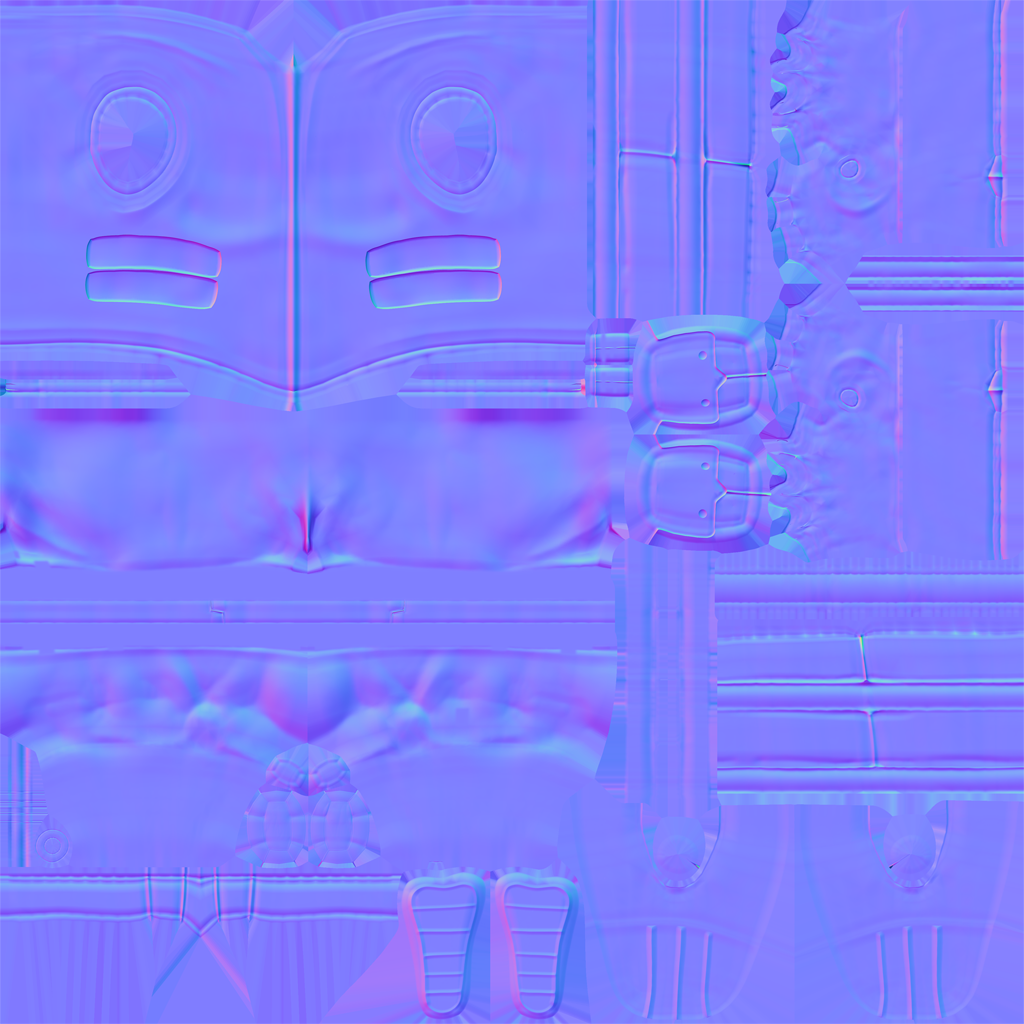
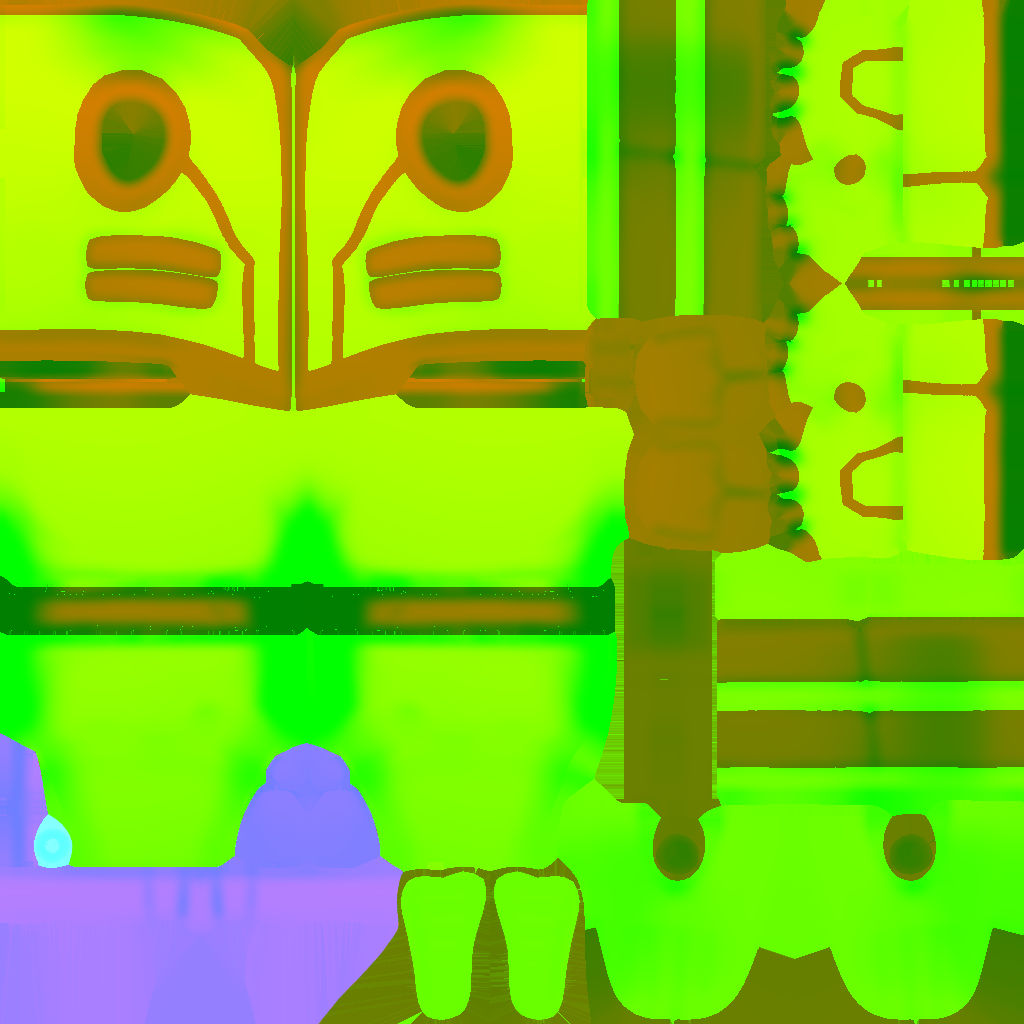
Multiple textures can be used to cover different surfaces of your character (For example separate textures can be applied to Clothing vs the, Body or Weapon).
For performance reasons it is a good idea to keep the number of textures to a minimum, however there are times when you will need to create more, consider the following when planning out your texture maps:
- It is most performant to map all of your character’s content to a single set of textures, however if you intend to make alt-skins with a new set of clothing or weapon for example, it might make more sense to split them up instead.
- Color masks have a hard limit of 10 separate colors per material, if you are planning on using dynamic colors and need more than 10 colors for a character this you may have to consider creating multiple materials.
- Textures should be exported from your painting software in .TGA or .PNG format.
- Textures resolution should ALWAYS be in powers of 2.
- This means that all of your textures should be one of the following sizes in pixels: 4,8,16, 32, 64, 128, 256, 512, 1024, 2048, 4096 (This is the maximum size allowed in Workshop).
- You can reduce your texture size in Unreal non-destructively so it can be a good idea to export at a larger size and then reduce it in Unreal based on the needs of the asset.
- Textures do not need to be square, rectangular textures are allowed as long as they follow the Power of 2 rule
(eg. 1024px wide by 512px tall)
Authoring textures for ROA2 can be done in your software of choice.
Sometimes artists will export a snapshot of their UVs along with baked texture maps and paint over them in a 2D painting program like Photoshop or a free alternative like Krita, almost like painting in a coloring book.
However more often artists paint directly onto the model for a more user friendly workflow, this can be done in Blender with plugins like UCU Paint or with other texturing software like Substance Painter. Either method can be useful and you may find you use both for different aspects the process.
High level overview of creating textures:
- Bake Normal Map and Ambient occlusion Map
- Paint Base Color Map
- Paint Shading Map
- Paint Outline Mask
Use Ambient Occlusion Map as foundation - Paint Roughness mask
Paint fully white if no gloss needed - Paint Metallic mask
Paint fully black if no metalness needed - Pack the ORMS map
Combine the Outline, Roughness, Metallic and Shading maps into one texture.
Baking Texture maps
The ROA2 internal process involves creating a high poly version of the character mesh and sculpting fine details before baking the high details down onto the low poly gameplay mesh. This is a common process and there are tutorials available. If you do not wish to sculpt details you can instead use a smooth modifier to create a high poly version of your mesh and bake maps using that.
Bake Normal Map
This texture is used directly in Unreal.
Ensure that Compression is set to Normal Map (Unreal will usually automatically set this on import if formatted correctly).
Not to be confused with Geometry Normals which are the surface shading angles stored in the geometry itself, a normal map is a texture that allows you to take the shading information from one mesh and apply it to another, the most common use case would be baking details from a high poly sculpt down to a low poly version, but we also use it to introduce hard angle shading or controlling specific shading angles on faces.
Even if you don’t have a high poly sculpt, you may consider duplicating your mesh, smooth modifying it and then baking a normal map from this high-res mesh onto your low poly version to improve shading smoothness.
These are a very standardized type of texture generated in most 3D software and there plenty of resources available to learn more about their creation.
Normal maps tend to fail when baked to low poly meshes with very sharp (90 degree) angles, it is often helpful to chamfer (or bevel) these low poly corners before baking for better results.
Because faceted geometry normals will break outlines, faceting should instead be baked into the normal map while the game geometry uses smooth shading.
Custom angles can be baked/painted into normal maps to help control shading in important high detail areas like the face.
Bake Ambient Occlusion Map
This map is not used directly in Unreal, rather it is used to help create the Base Color and ORMS Textures.
An ambient occlusion map is a shading map that bakes the results of a skylight onto your character’s mesh. Useful for capturing the details of your character and giving your a starting point to paint over. Cavities and undersides will be darkened while exposed areas will be brightly lit.
Tools for baking often allow for adjustment to the light angle, intensity and other factors.
These are a very standardized type of texture generated in most 3D software and there plenty of resources available to learn more about their creation.
Paint Base Color Map
Note: In Unreal, Material Instances can only access the Base Color map if the “UseBaseColorMap” parameter is enabled.
Red+Green+Blue channels control the color.
Alpha channel controls visibility (White areas are visible, black areas are not).
This texture is a standard color map like you would see used in many other games. It consists of a flat color layer with a shading map blended on top of it.
- Begin By Painting Flat regions of color across your model, try to use relatively neutral color values (Not too bright or dark) as we’re going to rely on the shading map to introduce shading variance next.
Tip: Keeping each color on a separate layer will help you to create Custom Color Masks later on. - Place your Ambient Occlusion Map in a new layer above your colors and use an overlay blend. It should now be affecting the colors below. Adjust the brightness values on it until you are happy with the results.
- Create another layer above that once again using an overlay blend and fill this layer with 50% grey, you can then hand paint this layer by using values above 50% for highlights and below 50% for shading.
- Line art is then painted onto a new layer using a multiply blend over the rest to add surface details. By default the lines are painted with a value of 20% (Dark Grey)to not fully obscure the base color but for certain areas like Eyeliner we use 0% value (Full black) .
You can Now export the result as your Base Color Map
Paint Your Shading Map
This map is not used in Unreal as-is, instead it is packed into the Alpha channel of the ORMS map (See Below)
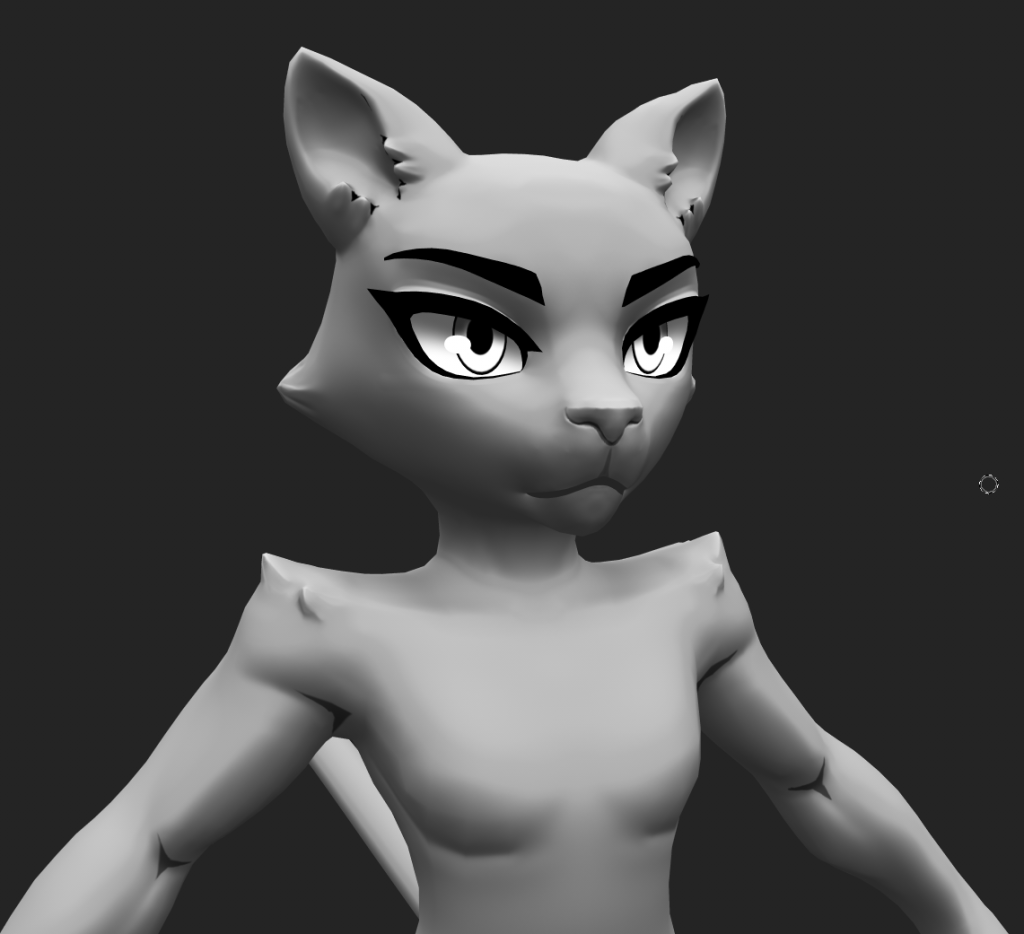
This is a greyscale map that includes shading details and line art but no color.
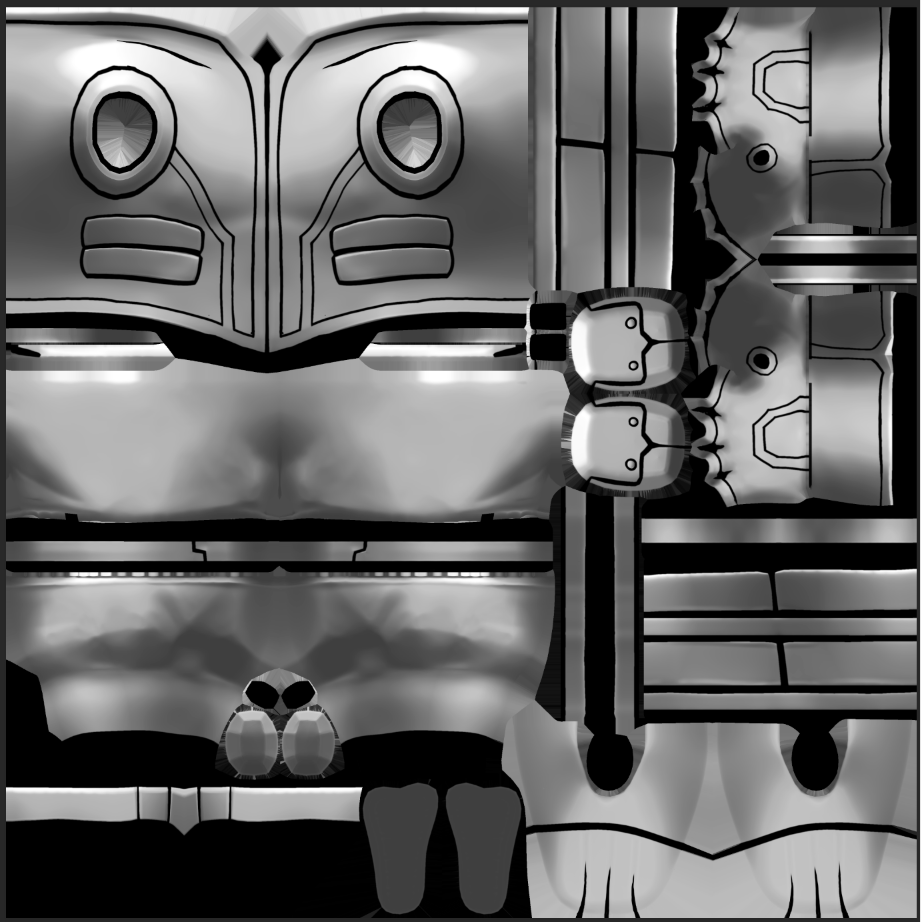
If you followed Steps 2-4 of the Base Color Map process then you have already completed your shading map. Disable the color layer(s) below and export only the shading layers above as your Shading map texture.
Note: You can try baking out other mesh maps to help define surface details in your textures. Try baking your mesh’s Object Normals in Blender and using the green channel of the resulting texture for a more detailed foundation for your Shading map.
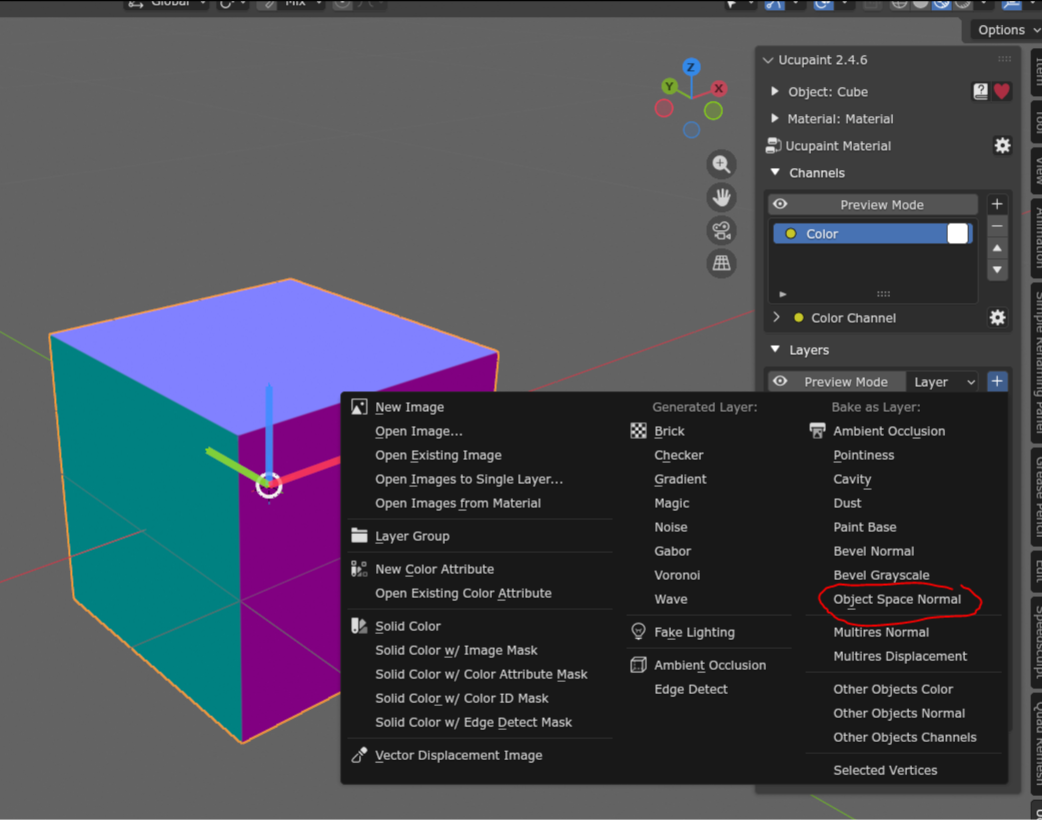
Paint Outline Mask
This map is not used in Unreal as-is, instead it is packed into the Red channel of the ORMS map (See Below)
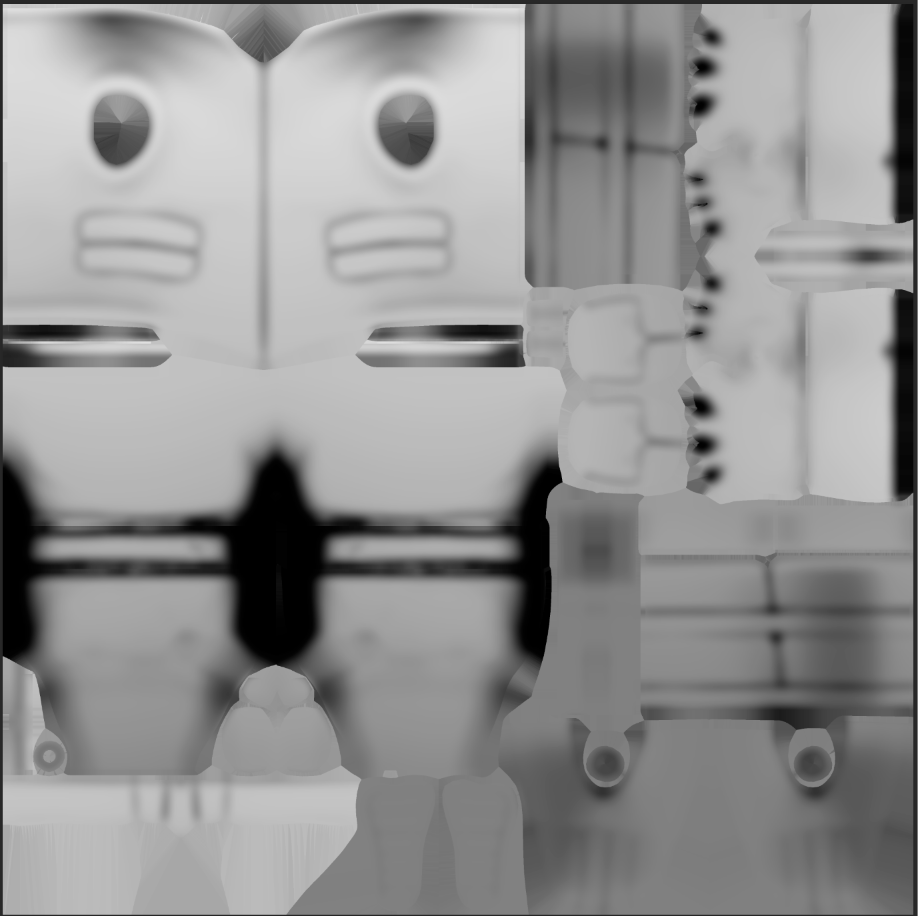
This black and white mask controls how thick the outlines of your characters are.
Black is no outline, white is full outline.
To see the outlines of your character in Unreal you must be viewing your character in game or by opening the character’s Blueprint Renderer/placing it in a scene. Viewing the character’s Skeletal Mesh asset directly will not display outlines.
Our style has it so that the lines are thicker at the top of the character and fade to thinner lines towards the bottom.
To build your outline mask:
- Start with a white base
- Add a baked Ambient Occlusion map and a baked world space gradient – white at the character’s head, dark near their feet – and multiply these over the base.
- Add a custom layer for painting out eyes, mouth and other regions you want to remove outlines for.
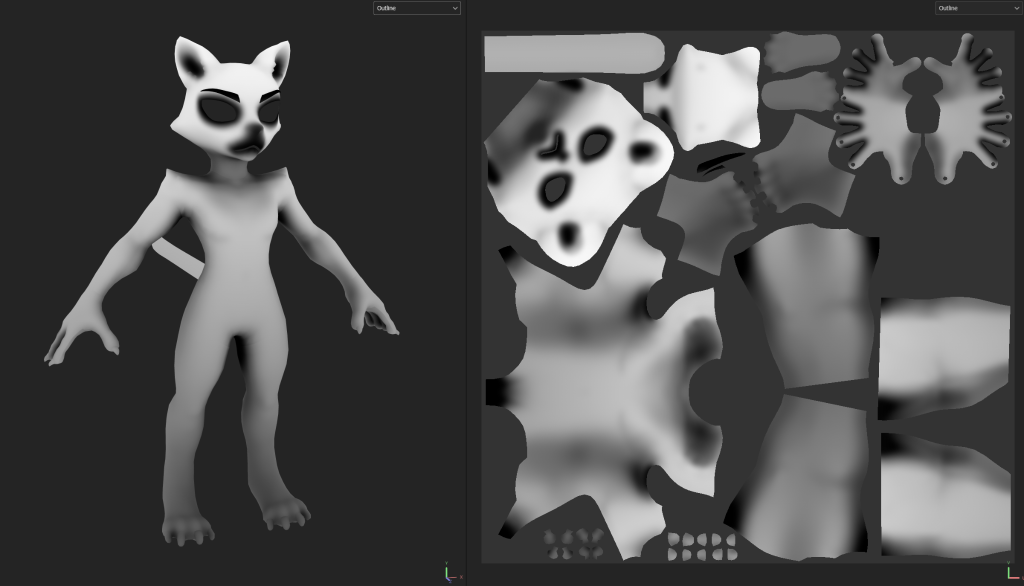
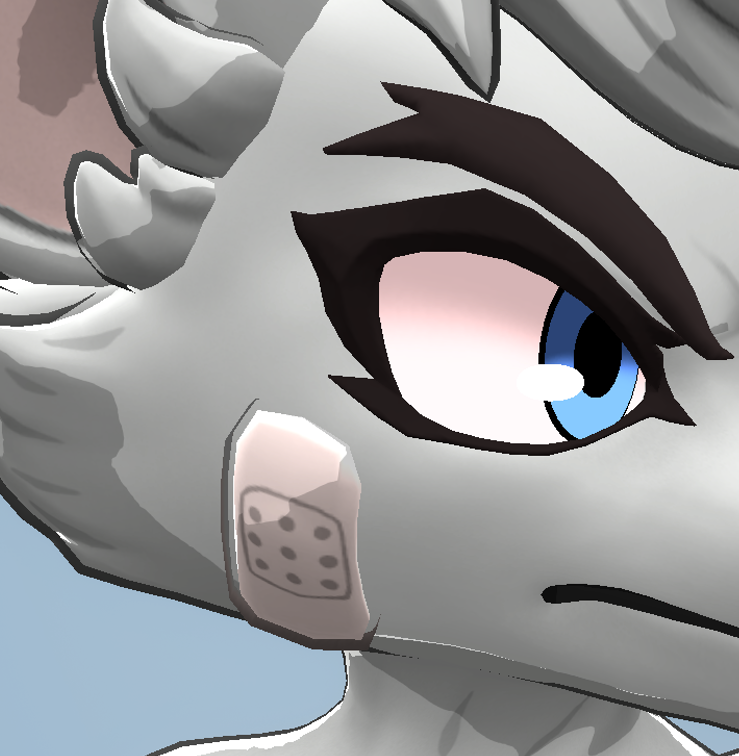
Sometimes when two meshes are too close to each other, the shells intersect causing ugly artifacts. Prioritize the mesh with the greater influence on the silhouette and shrink or remove the outlines from the smaller mesh like in this example of Olympia’s bandage where the small mesh outlines should be tighter and not clip into the face as much.
Paint Roughness Mask
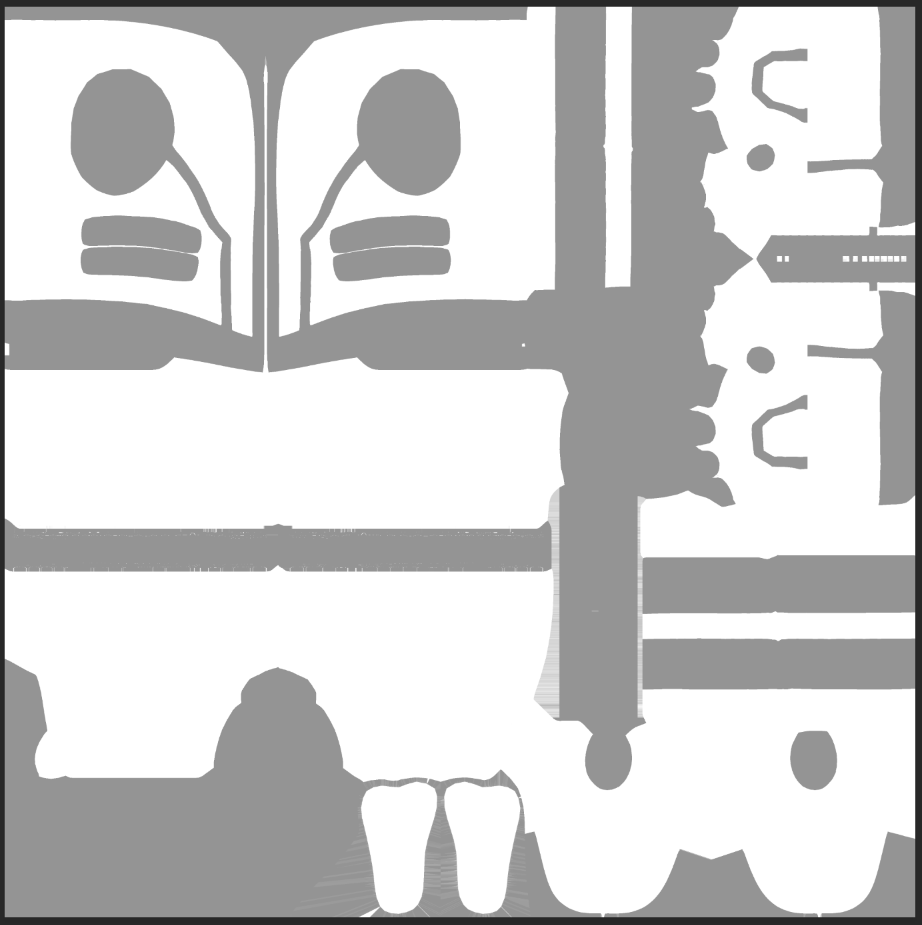
This map is not used in Unreal as-is, instead it is packed into the Green channel of the ORMS map (See Below)
This mask controls the Roughness of the surface – White areas are Rougher – and therefore less glossy, Black areas are Smoother with more gloss.
If you have an existing “Smoothness” map you may need to invert the color on it to make it compatible with ROA2.
Controls whether or not to draw the specular highlight in areas marked as smooth.
For most surfaces use solid white – Fully Rough
The MAT_Cha_Standard material works best with black and white values, so we usually just paint solid regions of white where needed.
Paint Metalness Map
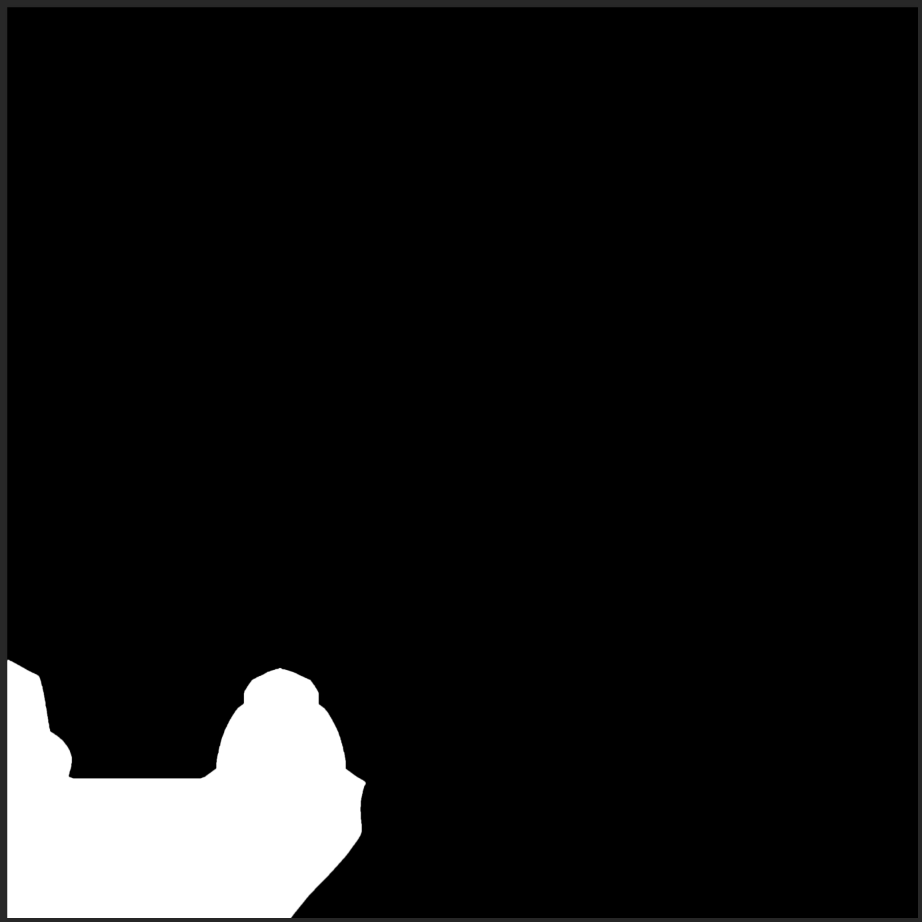
This map is not used in Unreal as-is, instead it is packed into the Blue channel of the ORMS map (See Below)
This mask uses black and white values to control the use of the Metalness (Matcap) texture for fake reflectivity. It also increases the contrast of the color in those regions.
Black is non metallic, white for shiny surfaces that reflect light like metal or some other smooth surfaces like glass, crystal, liquid etc.
Most objects are non metallic and therefore should have a fully black metallic map.
Warning: Material Instances must have the “UseMetalness” parameter enabled for this map to have an effect.

For best results, areas painted with metallic white should usually also be black in the roughness map.
Pack the ORMS Map (Suffix _ORMS)
The ORMS texture is used directly in Unreal and requires compression to be set to Mask after importing
The Outline, Roughness, Metalness and Shading maps must now all be packed into a single texture. This is a common method for optimizing texture usage and there are several ways to do this.
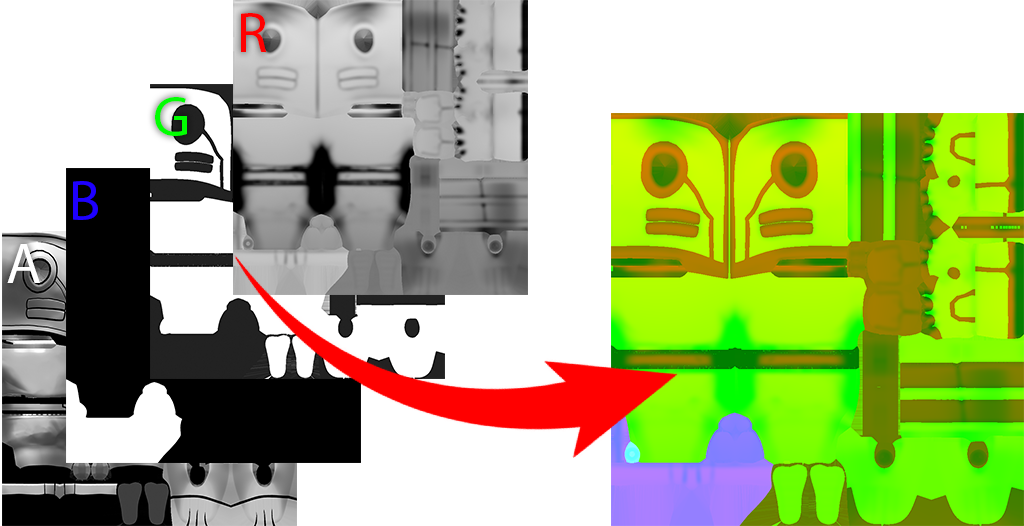
By default the maps are packed in the following order:
Outline Map – Red Channel
Roughness Map – Green Channel
Metallic Map – Blue Channel
Shading Map – Alpha Channel
You can author these masks as needed separately and pack them together using the following tool:
https://matheusdalla.gumroad.com/l/EasyChannelPacking
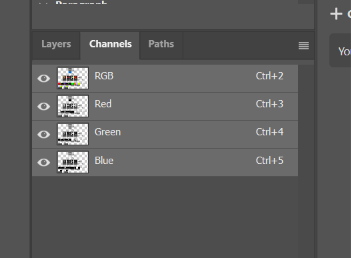
If you are working in Photoshop you can paste textures directly into the channels of an image in the channels tab.
You can also pack channels in Krita
https://victorkarp.com/channel-packing-grayscale-textures-in-krita/
Optional Textures
Opacity Map (Suffix _Opacity)
Ensure that the compression setting of this texture is set to “Alpha” in Unreal
The base color alpha channel controls opacity of your mesh but If you are using the Custom Color Map Process then you will need a separate opacity map.
You can paint one in black (Transparent) and white (Opaque) and enable “UseOpacityMap” in your Material Instance enable it.
Regions in white are fully opaque, regions in black are fully Transparent.
Black regions in the opacity map will also shrink your outlines in an effort to prevent ugly clipping on edges.
Dithering can be enabled in the Material Instance to support values in between black and white.
General Mask (Suffix _M)
Ensure that Compression is set to “Mask” in Unreal
Optional Material Instance features like emissive, fresnel, normal noise, etc. can all be controlled by a channel packed general mask, each channel can be used for a separate feature, each feature defaults to using the red channel but allows you to select a separate channel per feature if needed. This mask is only active if you enable one of these optional features.
Notes
The texturing process can be a big early hurdle for newcomers, however they are not at all required to proceed with Character creation.
If this is your first character it may be helpful to continue the character setup process until you reach the Setup Color Palettes step before coming back and creating your texture maps. This may help you determine how to properly author your textures and how you would like to proceed.
Naming
The file name suffix is important for automatically applying texture compression settings later on so be sure to follow this chart when naming your texture files.
| Texture Type | Suffix |
| Base Color | _BC |
| Opacity | _Opacity |
| Normal | _N |
| Outline, Roughness, Metallic, Shading (Channel Packed) | _ORMS |
| General Mask | _M |
Base Color Map Vs Custom Color Maps
You can choose to implement either a Base Color map, which is a simple color texture, or up to 3 Color Mask textures to dynamically recolor characters.
It is STRONGLY recommended to begin with the Base Color Map outlined in this page, especially for those new to 3D graphics.
Although all ROA2 content uses the dynamic coloring solution, this is mainly to improve internal workflows, there are many benefits to using the Base Color Map instead including:
- Faster results and less complex setup.
- Increased Fidelity and flexibility – Not limited in terms of color count, color blending is more accurate, shading can be implemented however the author sees fit.
- Better performance – The Base color map setup requires fewer textures and reduces the complexity of materials used.
Dynamic Custom Colors are beneficial if you want to create many palettes and don’t want to do a lot of image editing or painting, but the tradeoff is a much more technical setup, you could also convert to the Custom Color method later on if you wish once you have gained more experience setting up characters.
To learn more about Custom Color Maps Check out Setting up Dynamic Colors