
The main visual component of your character and the one that will likely take the most effort early on is the skeletal mesh asset. This page will give a brief overview of the techniques required to setup a character model and prepare it for textures. These steps will also apply to any animated geometry for Mesh Effects, Articles, Items etc.
Create your Geometry
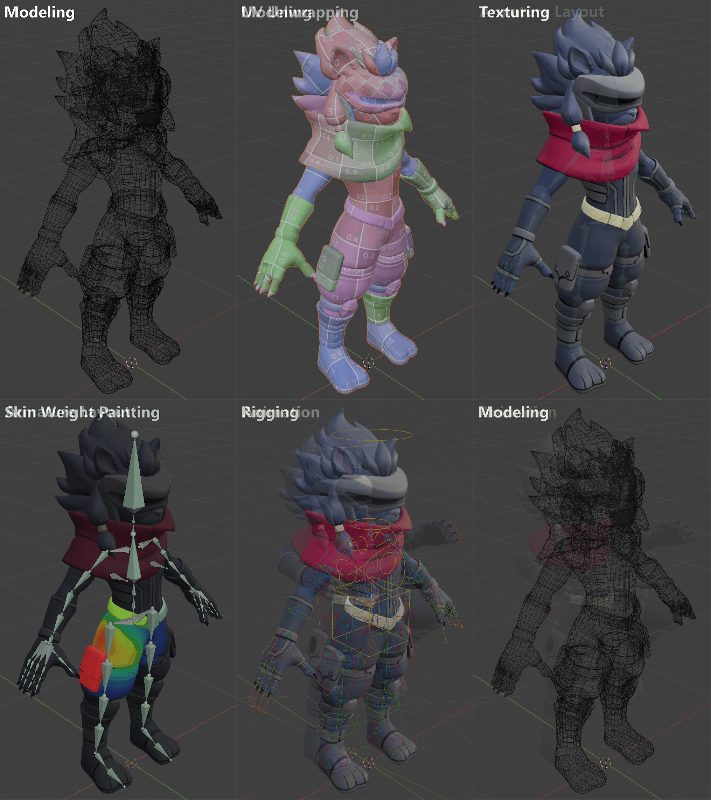
The geometry or “mesh” of a character is first authored in a 3d modeling program. If you are unfamiliar with working in 3d, we recommend Blender, a high quality free option.
For the purpose of the documentation we will assume this is the chosen software.
https://www.blender.org/download/
Character Models and animations are transferred between Blender and Unreal using the .FBX file format. Unreal allows you to re-import your model and texture assets as many times as you like non-destructively (without breaking existing connections), so it is recommended that you adopt a process of regularly exporting .FBX files into Unreal to evaluate progress along the way, instead of waiting until the very end to check your results.
Characters should be created facing the forward axis of your 3D software in Blender this is -Y .
Characters should be standing at the center of the scene with feet flat on the grid (Bottom of the feet on 0 in Z axis).
The average poly count for a ROA2 character or skin is approximately 50K triangles including their weapons, clothing and accessories.
Character mesh should be shaded entirely smooth to keep continuous outlines in game. Faceting will cause unreal to split the mesh and introduce gaps in your outlines. If faceted shading is desired it can be achieved via normal maps.
ROA2 characters are modeled in a relaxed A pose with their arms at a ~45 angle, you may wish to follow this method or use a T-pose (hands outstretched to the sides) for a more beginner friendly experience.
Ultimately your character’s model pose is up to personal workflow preference but generally keeping your limbs as straight as possible will help you when it comes time to set up animation controls.
Character models can be built in multiple pieces, as long as they are all bound to the same armature Unreal can merge them on import. Sections of your mesh are separated in Unreal by material assignment. For this reason materials should be assigned and named in Blender before exporting your mesh.
If your character has a weapon or other accessory that should be visible the majority of the time (Like during their idle and movement states) it should be included in their base model and armature. If they have accessories or other pieces that should only briefly be visible they can be created as separate meshes with their own armature.
Scale your Geometry
Standard Rivals character are approximately 2 meters tall in Unreal.
Unreal uses centimeters as it’s base unit, while Blender defaults to meters so you must also set your unit scale to 0.01 (Centimeters) in Blender.
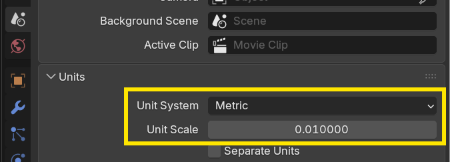
With your Unit scale set properly you can add a new cube mesh (not the default cube from when scene was created) and the scale should now match your character.
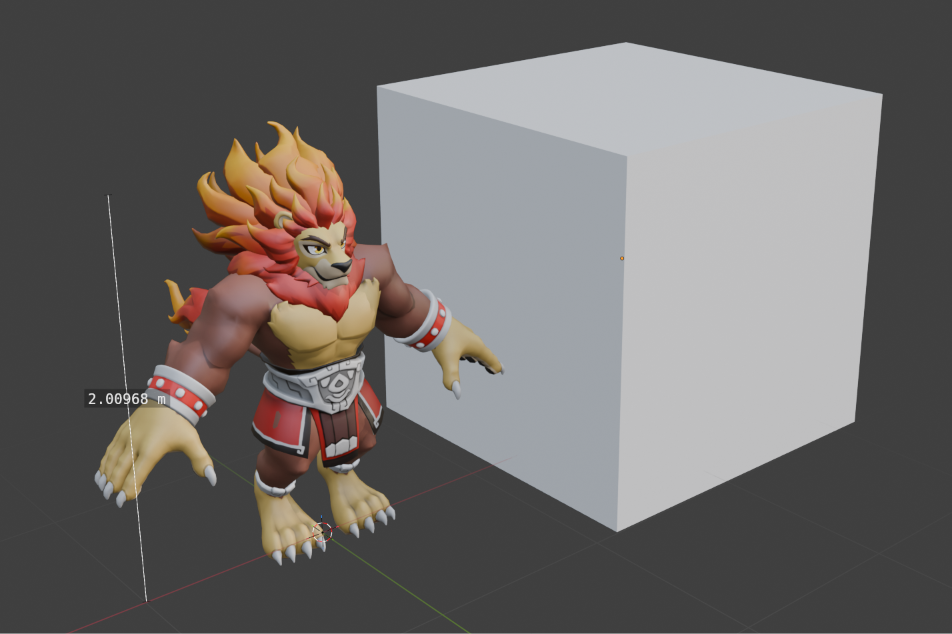
Kragg Scale Reference Blender File
Zetterburn Scale Reference Blender File
Olympia Scale Reference Blender File
Unwrap your Geometry UVs for Texturing
Before Textures can be applied to your model the geometry must be UV unwrapped. This involves projecting the 3D surfaces of your model onto a 2D plane. This is very similar to unwrapping an orange and flattening the peel.
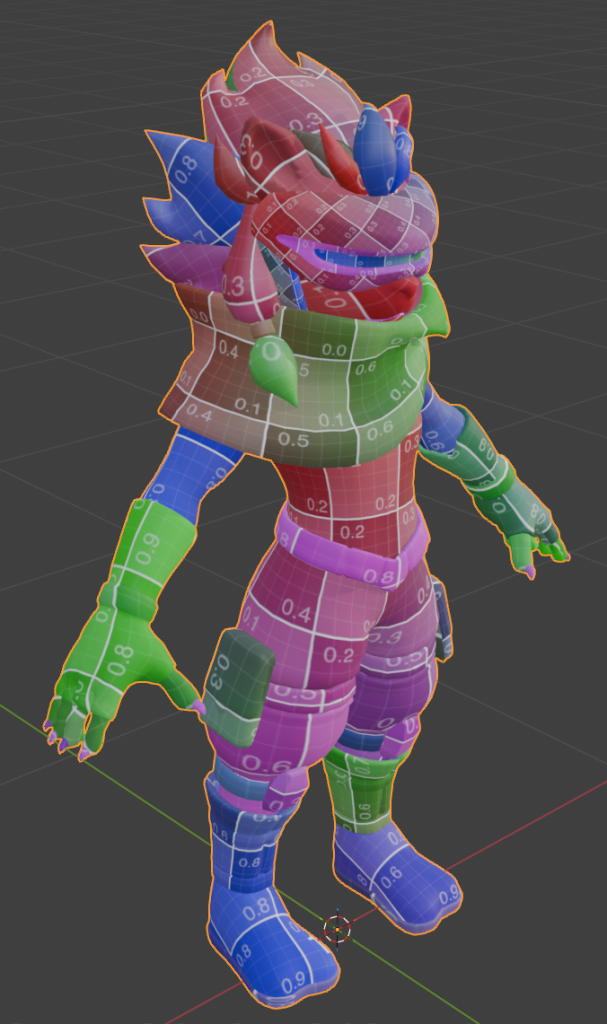
This is a common process for all 3D models and there are many guides available to learn more about this topic.
Note: The first 8 U regions (Horizontal UV axis) act as visibility masks.
Portions of a character or accessories that need to be hidden or revealed during gameplay can be mapped to these U regions. See Controlling Visibility for more info
Secondary UV sets can also be created to mask certain effects in the material.
Some things you should consider when laying out your geometry UVs:
- Textures should use up as much space as they can, lay out your UVs efficiently to make the most of your texture resolution.
- Space can be saved by mirroring textures across the body and other areas.
- UV shells can be rectified (deformed into rectangular shapes) in order to more tightly pack them.
- While you want your UVs to be packed tightly, it’s a good idea to leave some small gaps between UV shells and around the border to account for Mip-Mapping (Reduced texture resolutions used for distant assets, on lower end devices or when assets are still being loaded in) otherwise you may start to get texture bleed across your UV Seams.
- You can unwrap all of your geometry onto the same texture sheet, or split them into multiple textures if that makes more sense for your character or workflow. Keep in mind that more textures means more materials and more resources used to draw them so split textures up sparingly.
https://studio.blender.org/blog/a-uv-unwrapping-guide/
Geometry Normals
Geometry normals (Not to be confused with Normal Maps) are the standard method by which 3D programs shade your geometry.
In blender by default objects are shaded with faceting, where shading does not evenly blend between faces, these hard shading edges will break the character outlines in unreal, instead geometry should all be marked as shade smooth before exporting it. Hard edges can instead be baked into a normal map.