
Mesh and animation files are transferred from Blender into Unreal via the .FBX file format. Only geometry, armature bones, materials and textures can be transferred this way. Animation Control rig and other nodes are not meant to be imported into unreal.
Unreal only supports Armature (Joint) Deformers and Shape Key (Morph Target) Deformers. Other types of animation Deformers available in blender must be somehow represented by bones or morph targets.
Unreal supports non-destructive updating of your content, after a file is imported into Unreal it can be re imported as many times as you wish and Unreal will attempt to preserve connections. It is recommended to export your FBX files in a consistent location with consistent naming to make re-importing assets in Unreal easier.
Export Skeletal Mesh From Blender
Before exporting any animation we want an FBX file that contains only mesh and bones in the bind pose.
Export preparation checklist
- Set all mesh to shade smooth to ensure Outline continuity in game.
(If shade smooth does not initially work, you may need to clear sharp edges and custom normal data from your geometry as well.) - Ensure all mesh is bound to at least one joint in the armature
- Apply modifiers to your geometry.
- Ensure that your scene scale is set to Metric and units are 0.01 (Centimeters)
- Make sure the character is scaled correctly and facing forward (-Y in Blender).
- Apply transforms to your armature (Scale values should be 1 on all joints, Rotation values should be 0).
- Make sure that the character is in it’s bind pose on frame 0 (the same pose that it was in when bound to the skeleton, you don’t want any rig controls offset moved during export of the character mesh)
- Assign all materials needed.
- Verify that the armature, mesh and materials have sensible names.
WARNING: If the Armature Root node is named :”Armature”, unreal may discard this node causing potential issues. Be sure to rename it.
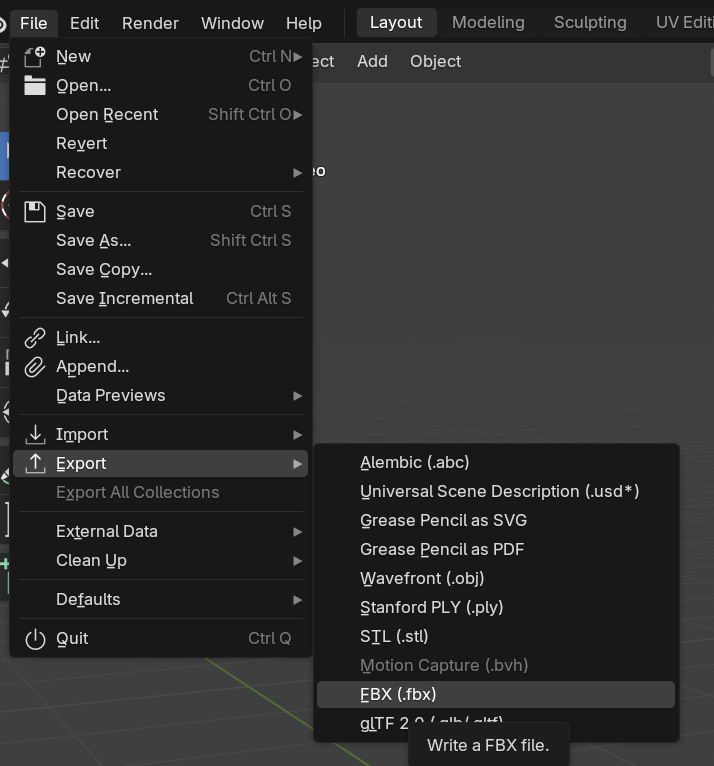
Select the mesh and armature then click File → Export → FBX (.fbx).
At the top of the export settings create an export operator preset using the following recommended export settings. you will be using this preset to export all skeletal mesh into Unreal:
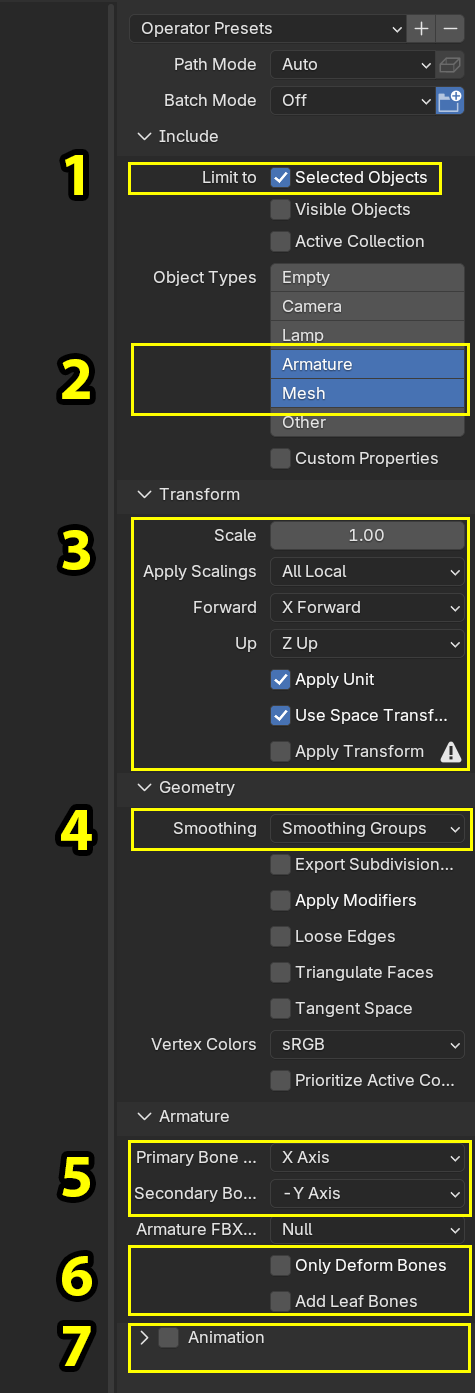
- Limit to: Selected Objects
(Or setup your own method for controlling which objects are included) - Object Types: Armature and Mesh
- Scale: 1
Forward: X Forward
Up: Z Up
Apply Unit: True
Use Space Transform: True - Smoothing: Smoothing Groups
- Primary Bone Axis: X Axis
Secondary Bone Axis: -Y Axis - Only Deform Bones: False
- Add Leaf Bones: False
- Animation: False – We will set these options when it comes time to export animations
The resulting FBX file should include only mesh, and armature joints along with shape keys, assigned materials and textures, NO animation rig controls or keyframes should be present in this file. You can open an empty scene in Blender and import the .FBX file to review it’s contents if needed for troubleshooting purposes.
Export Animation From Blender
- Animation should be exported into an FBX file that is separate from the character mesh.
- Each animation should be created as a separate action in Blender.
- Multiple animation actions can be exported to the same FBX file.
- Unreal will import animations based on your Animation action names or NLA strip names in blender so be sure to name them sensibly before exporting. You can review the various states required along with their names in the Animation States Page.
There are effectively 3 options to export animation sequences from Blender to Unreal. The option you are using will determine the export settings you should use.
Export all animation Actions
This method exports all actions present in the scene into an FBX file.
Create a copy of your character export Operator preset and edit the following settings then click export:
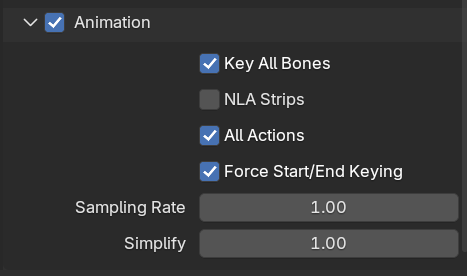
- Animation: True
- Key All Bones: True
- NLA Strips: False
- All Actions: True
Export a single animation Action
This option exports only your current active action into an FBX file. Use this if you want to focus on exporting a single action for quick iteration.
Select your animated armature node and then

- Open the action editor window
- Click the action dropdown and set your active action to the one you would like to export
Then create a copy of your character operator preset and edit the following settings and click export:
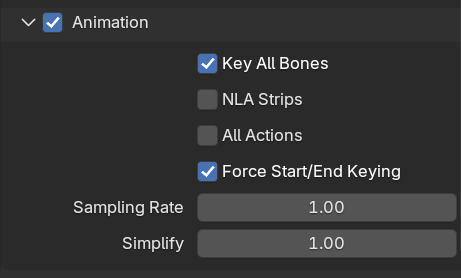
- Animation: True
- Key All Bones: True
- NLA Strips: False
- All Actions: False
Export a selection of animation Actions
If you want more control over which actions are exported, you will need to use the Nonlinear Animation Editor (Sometimes referred to as NLA strips). This editor is often used for animation sequencing and blending but for our purposes we will mainly be using it as an export management tool.
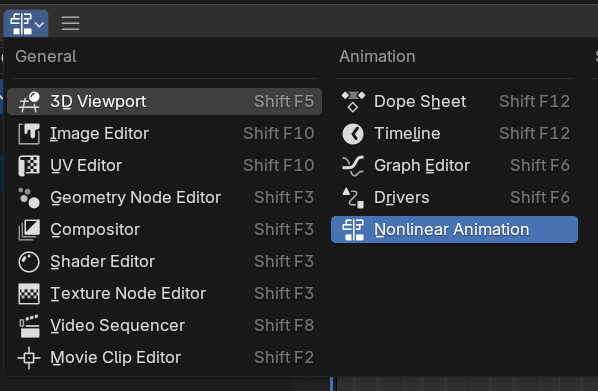
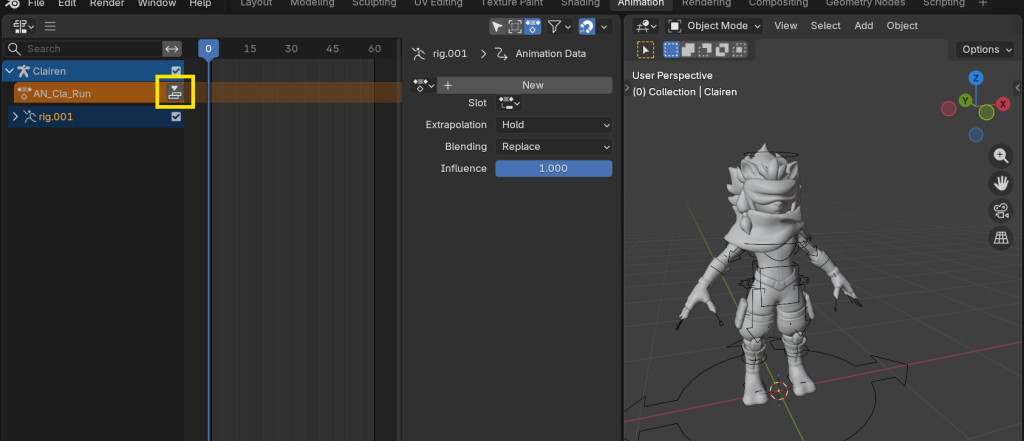
Open a Nonlinear Animation editor window and you should see a list of all animated actors in the scene along with their currently active animation actions.
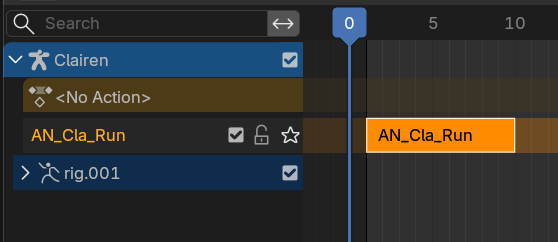
Click the Push Down button while an action is active to assign it to an NLA strip.
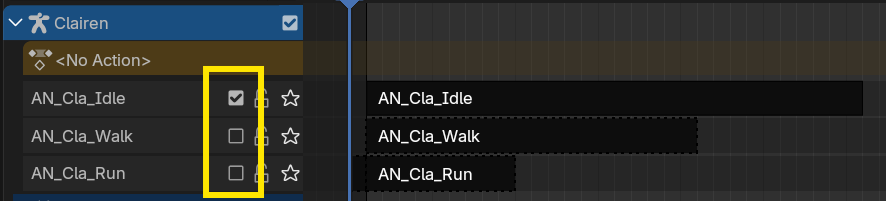
Once you have assigned all of your actions to separate NLA strips you can use the checkbox beside each one to determine which actions to export.
Next create a copy of your character operator preset and edit the following settings and click export:
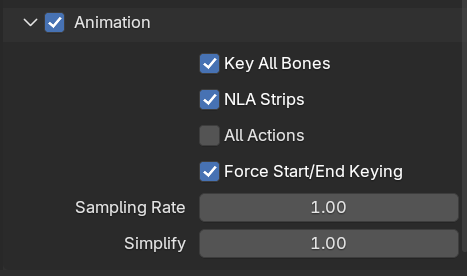
- Animation: True
- Key All Bones: True
- NLA Strips: True
- All Actions: False
Blender will export all of your selected animation actions to a single FBX file which can then be imported into Unreal.