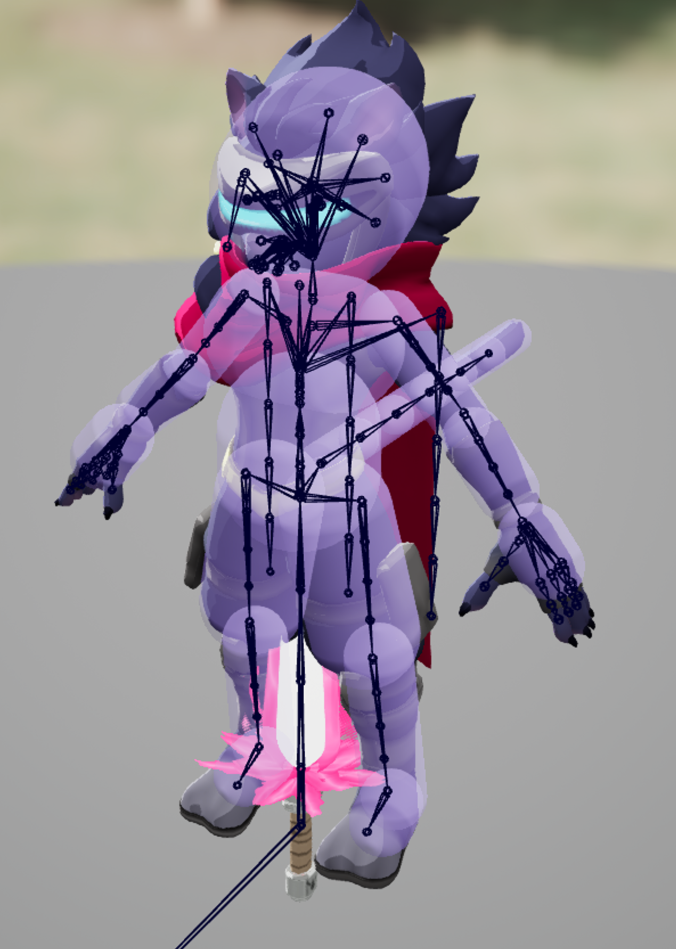
Physics assets are generated on import of a Skeletal Mesh and are assigned to them. They are comprised of various capsule volumes assigned to joints sourced from the associated Skeleton Asset. These capsules describe various aspects of a character for use in physics and visuals systems.
Articles and Mesh Effects can use a single Physics asset in most cases, whereas character skeletal mesh require multiple.
A Shadow caster (and screen culling) physics asset, as well as a hurtbox physics asset.
Physics Asset Editor – Unreal Documentation
When your mod files are initially generated, template Sandbert Physics Assets will be generated for the Hurtbox (HB_) and the Shadow caster (PH_) for your character.
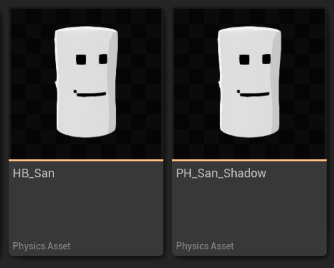
- The HB_ Physics Asset defines which areas of your character can get hit.
- The PH_ Physics Asset controls capsule shadow casting and screen culling (hiding your character when offscreen for optimization purposes).
If you replaced the Sandbert Skeletal Mesh and Skeleton asset with your own, you will need to open these to reconnect them to the newly generated skeleton asset and then properly set up the capsules in each.
If you are importing a separate Skeletal Mesh a single Physics Asset will be generated as long as create Physics Asset is enabled.
If a Physics Asset was not created, right click on the Skeletal Mesh in the content browser and click Create>Physics Asset>Create and Assign

Searching Physics in the asset details panel of a skeletal mesh will allow you to assign this second physics asset to two separate slots.
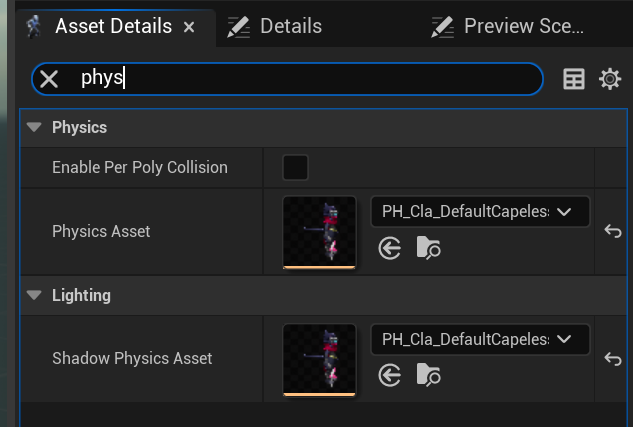
The physics asset assigned to the first slot will allow the engine to use more precise culling when parts or all of a character moves offscreen, without it the engine uses only the asset’s bounds which can lead to a character vanishing during gameplay.
The second slot will allow the game to render capsule shadows.
Try to encapsulate the major volumes of the asset without necessarily adding capsules for every bone, for example Clairen has capsules for her hands but not fingers, as such granular detail isn’t required in either screen culling or shadow rendering.
After you have imported your character model into Unreal, you will need to add hurtboxes to your character model’s HB_ physics asset. (Not to be confused with the PH_ Physics asset generated which is used for visuals like shadows and screen culling)
- In the unreal editor, navigate to Content/ModContent/[ModID]/UnrealAssets
- Open the HB_ asset (HB_[CharacterName]).
- IMPORTANT: Delete and re-create any bodies containing shapes that are not capsules. Otherwise the game will crash when you try to playtest your character.
- Select the non-capsule shape in the viewport. This will select the body the shape is attached to.
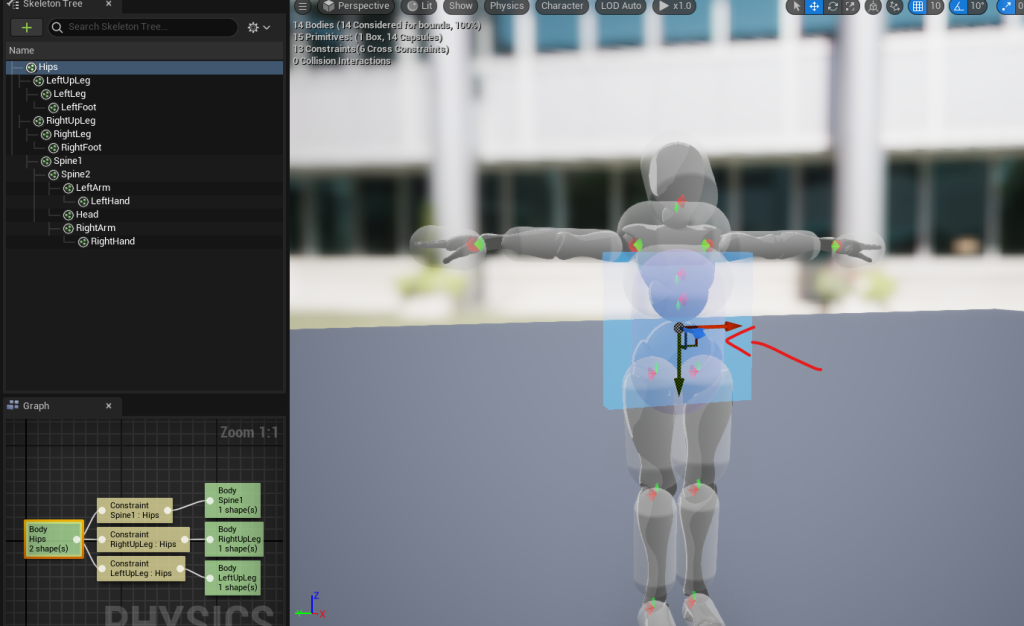
In the Tools tab on the bottom right, make sure Primitive Type is set to Capsule. Then click Re-generate Bodies to remove the unwanted shape so there is only a capsule on the body.

Click on the newly generated capsule in the viewport and use the transform tools to re-adjust the location, rotation, and scale of the capsule until it is aligned the way you want it.

Continue to adjust the transforms of other collision capsules as needed on the physics asset using the transform tools until you are happy with the results.
Hook up Hurtboxes to the CharacterData
You will need to assign the hurbox Physics Asset to the CharacterData, as well as add Hurtbox Definitions so the character can be hit.
Set the Hurtboxes Skeletal Mesh to the skeletal mesh for your character.
Set the Hurtboxes Physics Asset to the HB_ physics asset for your character.

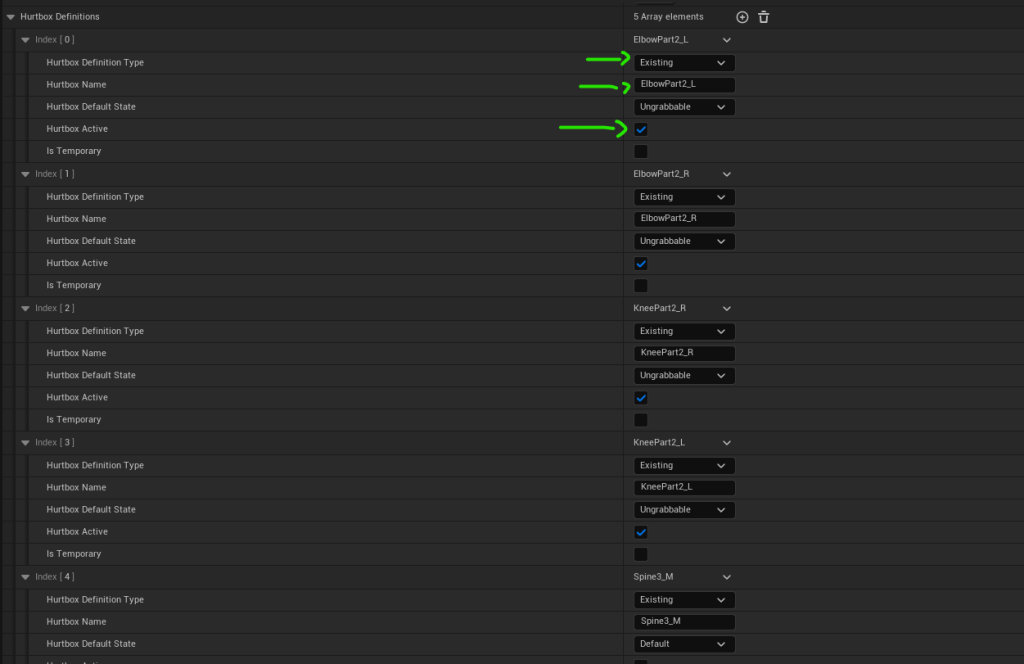
Use the + icon next to Hurtbox Definitions to add a new entry. Do this for each physics body on your physics asset containing capsules you want to treat as hurtboxes.
For each entry, set the Hurtbox Name to the same name as the physics body you want to treat as a hurtbox defined on the physics asset.
Also make sure to set the Hurtbox Definition Type to Existing. For hurtboxes that need to be active immediately (most hurtboxes), make sure Hurtbox Active is checked.