
Attack Data Asset
When you create a character, Attack Data assets are automatically generated and placed in the character’s Attacks folder. For modded characters, this is Content/ModContent/[ModID]/UnrealAssets/Attacks.
Attack Data file names start with the ATT_ prefix.
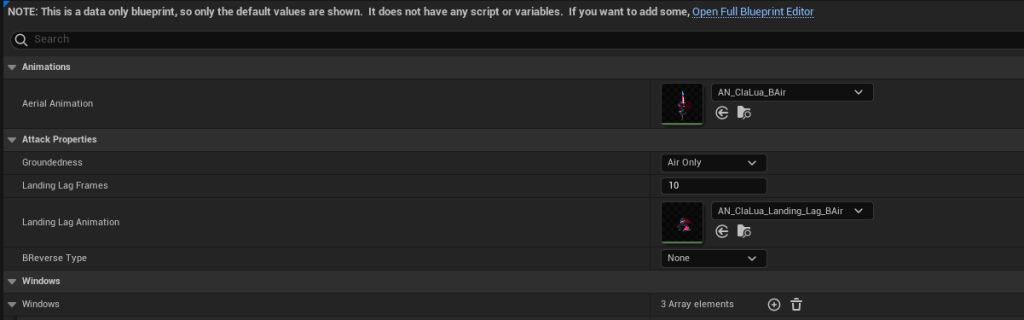
To edit the properties for an attack, open the specific ATT_ file for the attack you want to work on. For example, to modify ClairenLua’s Back Air attack, go to Content/ModContent/3520423817/UnrealAssets/Attacks and open ATT_ClaLua_BAir
Grounded and Aerial Attacks
Attacks in Rivals 2 can be performed on the ground or in the air. For aerial attacks, there is an additional animation slot you have to add for the attack’s aerial animation, as well as an optional landing lag animation when the character lands while performing the aerial attack.
In addition, each attack also has a Groundedness value, which defines whether the attack can be performed in the air, on the ground, or both.
Note that you do not need to setup aerial animations if your attack is a Ground Only attack.
Hitbox Attributes
Under the Hitboxes category in the attack data, there is a Hitbox Attributes list.
To add attributes for a new hitbox, click the + icon next to Hitbox Attributes.

Set the Name of the hitbox to whatever you want. Note that this name will be used in the Hitbox Windows section to toggle the hitbox while performing an attack.
Set the Bone Name to the name of the bone on the character’s skeletal mesh you want the hitbox to be attached to.
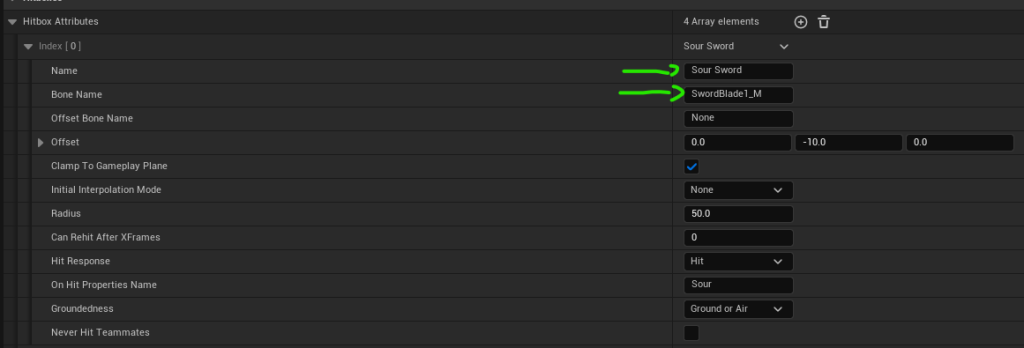
You can set additional properties on the hitbox attributes, such as adding an offset from the attached bone location, radius of the hitbox, and the name of a set of on hit properties.
On Hit Properties
You will need to add on hit properties and link a hitbox to them if you want the hitbox to apply knockback on hit, as opposed to grabbing the opponent.
To add on hit properties for hitboxes, scroll down to Hitbox Attributes in the attack data asset, and click the + icon next to it.
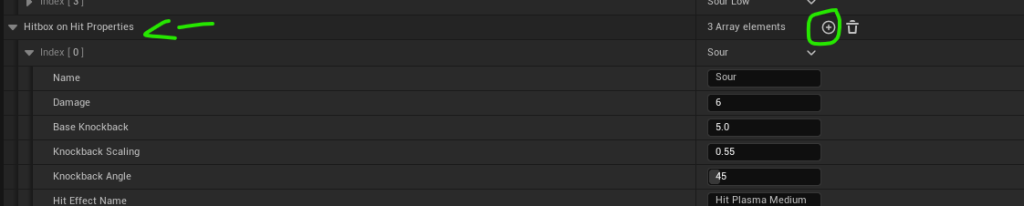
The on hit properties are separated from the hitboxes so that multiple hitboxes can use the same on hit properties without duplicating extra data.
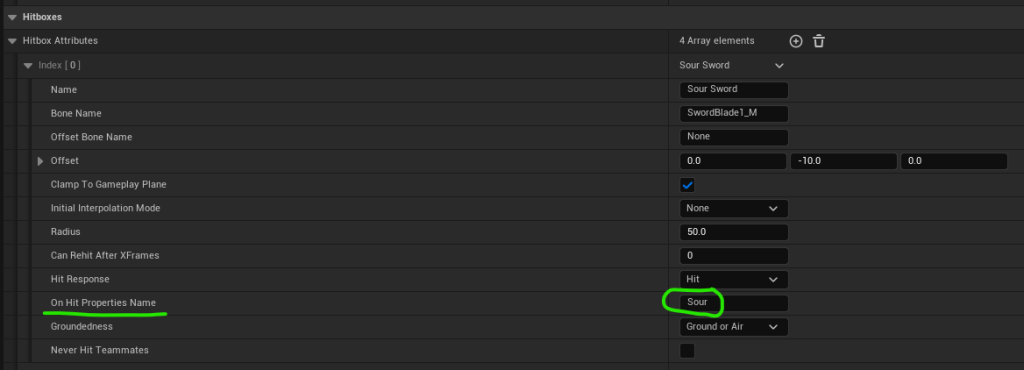
For linking hitboxes to on hit properties, you will need to (1) set the Name of the new entry in the Hitbox On Hit Properties, and then (2) go back to the Hitbox Attributes for the hitbox you want to link the properties to, and set the On Hit Properties Name to the same name.
1

2
Attack Windows
Each attack has an array of windows, which each define a different phase of the attack as well as how many frames it will last. Attack windows can be chained so that after one attack window finishes, the next one starts.
Attack windows are used to define frame timings, cancels into other windows/attacks, movement data, and hitbox windows.
To add a new attack window, click the + icon next to Windows.

Each window has a String Table Key, which is the name of the attack window. This name must be unique from other attack windows in the same array (so an attack cannot have more than 1 window named Startup).
For a very basic attack, you only need 3 windows: Startup, Active, and Recovery.
Hitbox Windows
Each attack window can have a list of hitbox windows, which define when the hitboxes defined in the Hitbox Attributes become active.
To add a new hitbox window, expand the attack window you wish to add hitboxes to, and then click the + icon next to Hitbox Windows.
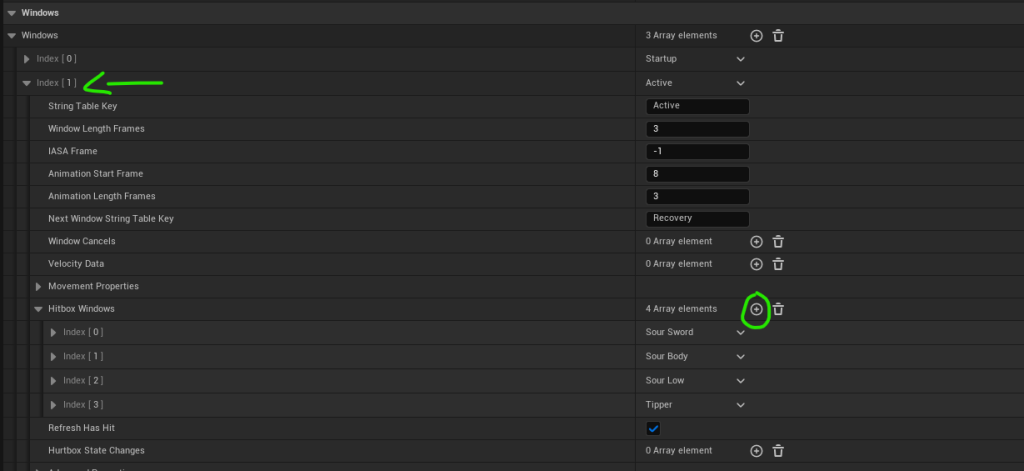
Each hitbox window has a Hitbox Name, a Start Frame, and the Length in frames the hitbox is active for.

Hitbox Name must match the name of a hitbox defined in Hitbox Attributes.
Start Frame is relative to the current attack window the hitbox window is in, so if you want the hitbox to be enabled at the start of the Active window for example, and the Active window starts at frame 8 of the attack animation, then you still set the hitbox window’s Start Frame to 0. If you want the hitbox to be enabled 3 frames after the start of the window, then set Start Frame to 3. When Length in Frames is set to 0, it will cause the hitbox to be active throughout the full duration of the window (while still respecting the Start Frame)