
The victory sequence plays at the end of a match and is an opportunity to add some personality to your character as well as show them off up close, it consists of a Victory Data asset that loads character animations and effects as well as a level sequence file that contains camera animation and post processing effects.
Upon Generating a character mod a Victory Data and Level Sequence file will be created in UnrealAssets/Skins/Default/Data
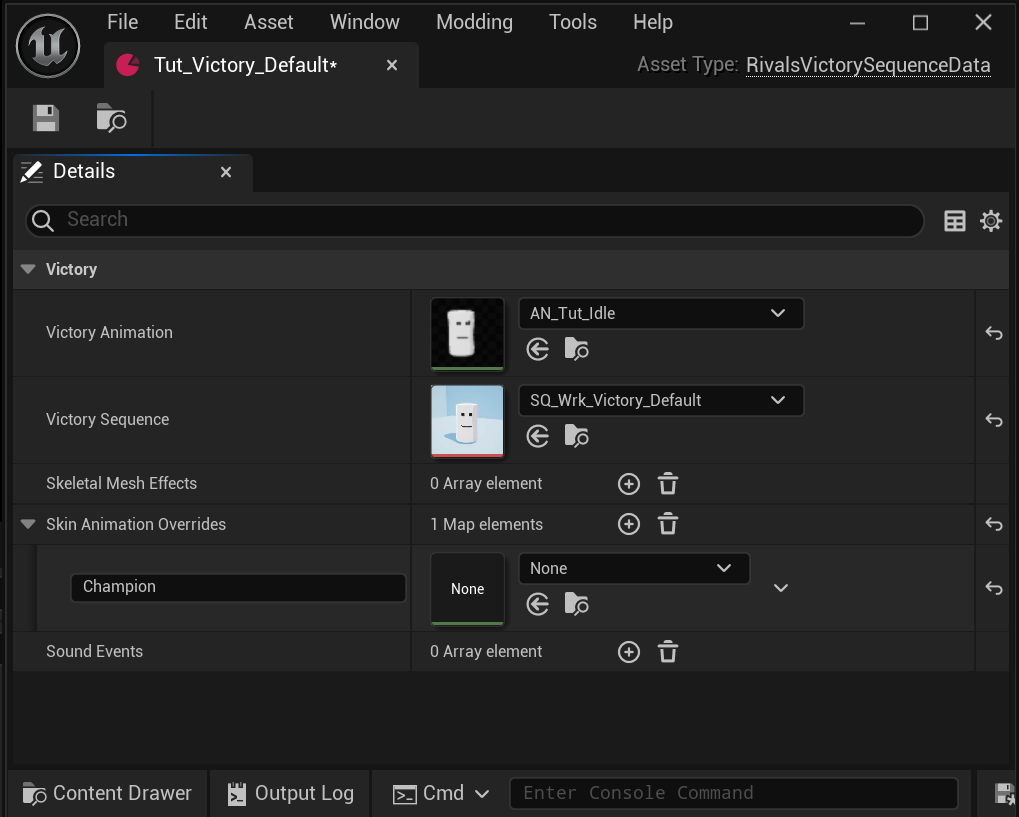
By default it will load the character’s Idle animation, with a camera motion that orbits and stops at roughly a 3/4 view. This is designed to work well with most characters by default.
If you want to create your own victory sequence you can animate one in Blender including the camera motion.
- Consider making a separate scene for animating victory.
- Base Cast Victory Animations are 360 frames or 6 seconds long and freeze on their final frame.
- Make sure that your animation starts on frame 0 – this will be important for importing camera motion later on.
- For best results animate your sequence camera largely facing toward the stage environment rather than the empty space behind it, a reference file is available at the end of this document for this purpose.
- Export character animation as usual.
- Export camera motion as an FBX. Ensure that the camera is at the root of the scene hierarchy, constrain it to a controller rather than animating it directly so that its motion is in world space.
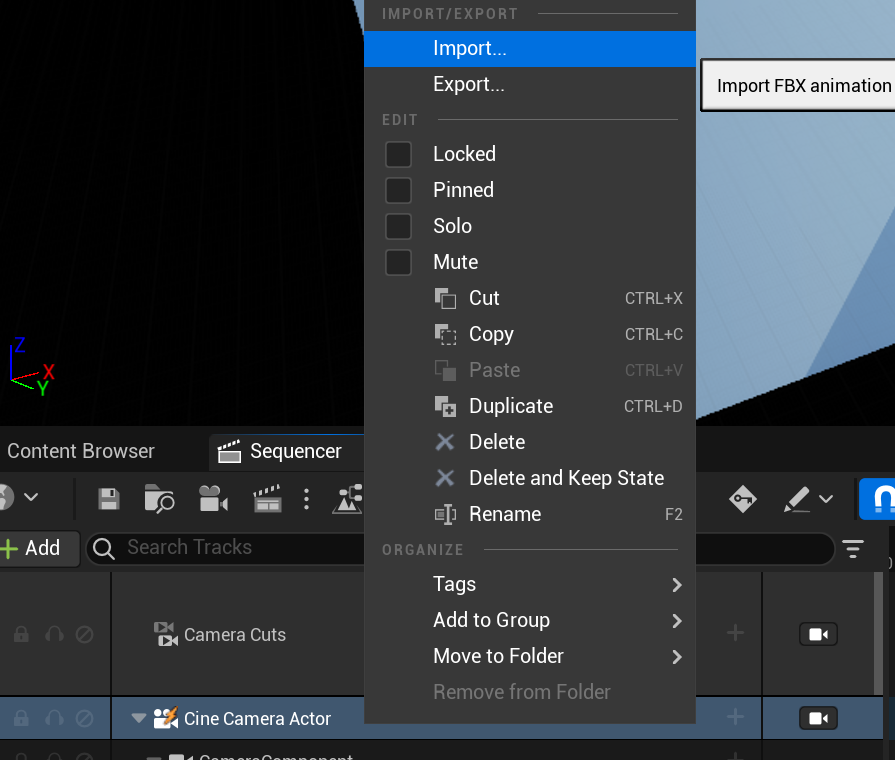
In Unreal open the victory Level Sequence Asset, right click on the Cine Camera Actor track and click Import and select your exported camera animation FBX.
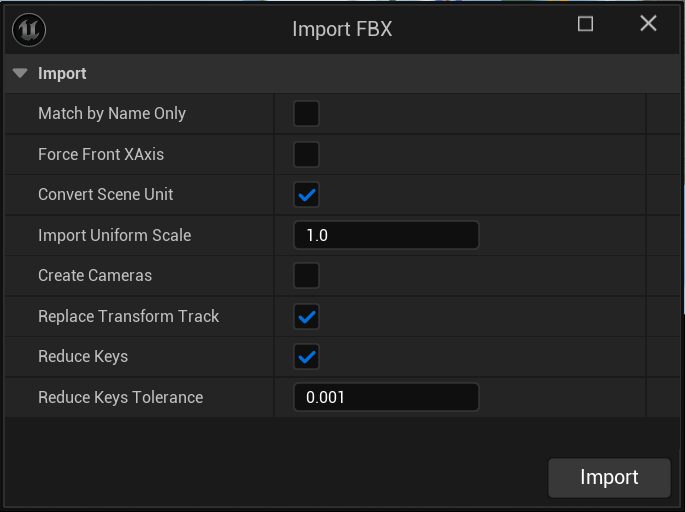
Use these settings for import:
Match By Name Only Off
Force Front X axis Off
Create Cameras Off
Add Mesh Effects and Articles
Mesh effects Can be added in the Victory Data the same way they are added to Attacks. If you wish to add an article you may first need to define it as a mesh effect.
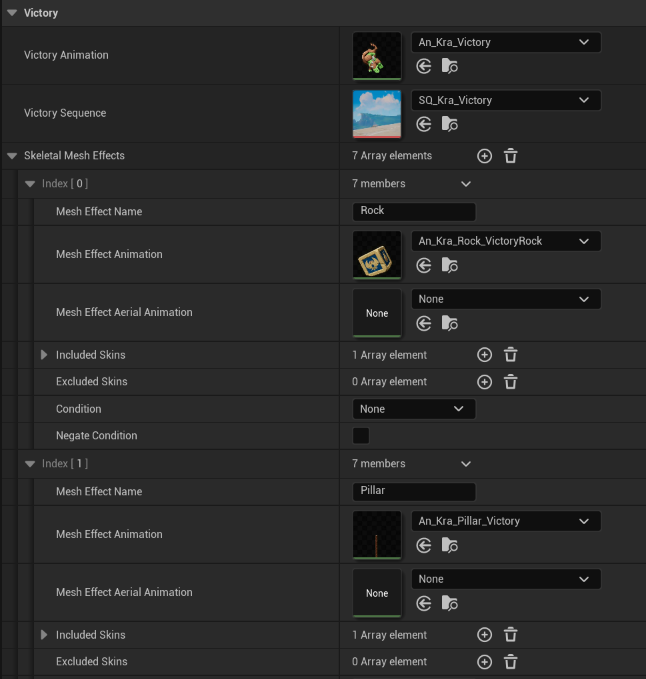
Adding them this way will allow them to be recolored/replaced on alt skins and palettes.
Warning: If your Mesh effects or Character disappears during the victory sequence, they most likely are missing or have an improperly setup Physics Asset (PH_). You can generate one quickly by right clicking on your skeletal mesh in the content browser and selecting Create/Physics Asset/Create and assign. Physics Assets
Keep States
By default when a sequence track reaches the end of playback it will revert to it’s default state. Ensure that your actors have “When Finished – Keep State” active on their tracks to prevent them from reverting or popping back at the end of the victory sequence.
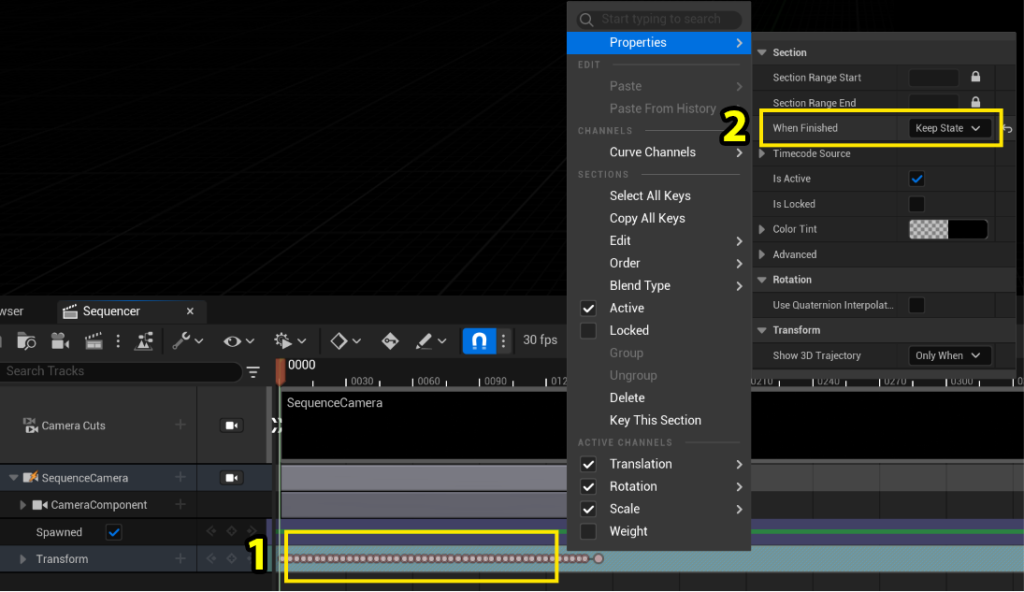
Right click on the tracks on the right hand column where keyframes are added and select properties, then set When Finished to Keep state.
Notes
Any additional tracks added to your victory sequence should be set to External ownership to prevent them from resetting at the end of the sequence.
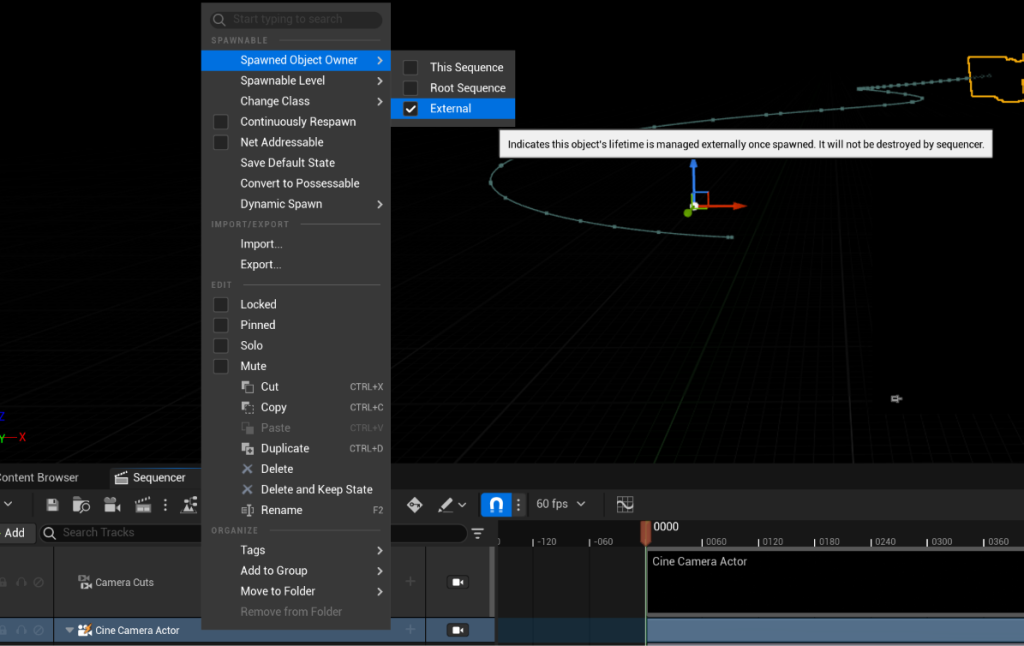
You can right click on the track and click Spawned Object Owner/External.
If you are making your own sequence or adding your own camera ensure that the following values are set on it by selecting it’s track and editing them in the Details panel. These values will ensure that the camera scales appropriately for ultra wide aspect ratios instead of being cropped by pillar boxes.
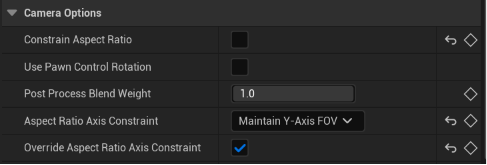
- Constrain Aspect Ratio – Unchecked
- Aspect Ratio Axis Constraint – Maintain Y-Axis FOV
- Override aspect Ratio Axis Constraint – Checked
If you import camera motion and nothing seems to happen, check if your Camera keyframes are positioned later on down the timeline, the keyframes will be imported at the exact same point in time that they were authored in Blender, so if you made your animation start on frame 1000, it will import on frame 1000 of the sequence.
Character and mesh effects plus their animations are not added to the level sequence, instead they are loaded dynamically via the victory data. This allows your victory sequence to use dynamic recoloring and alt skin overrides.
Open your Victory Data file and assign the character animation, any required mesh effects and sound events, your victory sequence should now be fully setup.
If your Mesh effects or character disappear during the victory sequence, they most likely are missing or have an improperly setup Physics Asset (PH_)
Victory Reference File
Download the Victory Camera Safety Reference FBX file and import it into your animation scene in order to get a rough reference for the safe zone (No clipping with environment objects) for animating your character and camera. Try to keep both contained within the green safety zone cylinder.
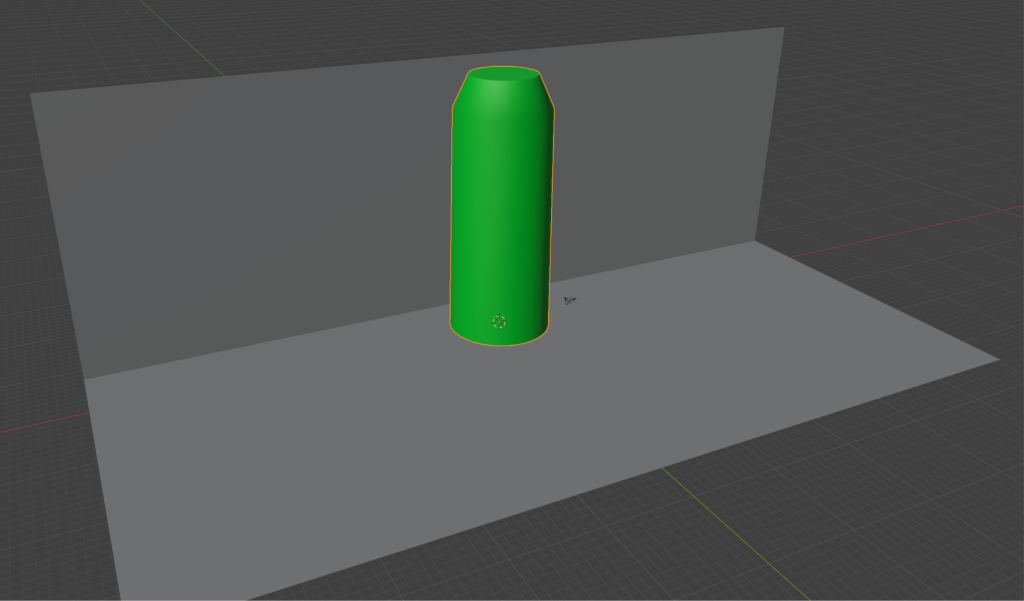
Also try to animate your sequence so that the camera ends up facing the Environment object (The grey card representing the stage environment) as this area has the most detail and visual quality.