
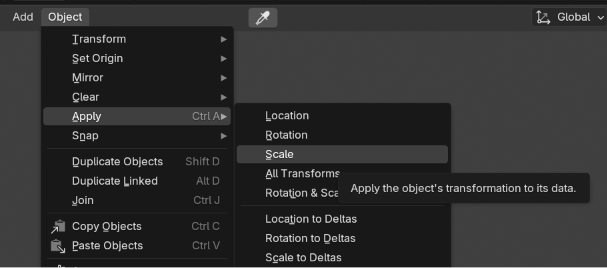
With your character modeled and UV unwrapped it is time to start thinking about animation, however altering the scale of a character once you’ve begun animating it can be tricky, be sure to apply any transforms to your character mesh ( Select your mesh and click object/Apply/Scale) and check it against ROA2 character models before proceeding.
- Prepare the mesh. Ensure that the character is:
Facing the right way (Facing down -Y)
Scaled correctly (Compare to other rivals characters)
Positioned properly (Centered on X and Y axis, feet planted on the grid in Z axis)
Then apply transforms. - Set up the armature (Either from scratch or use Rigify)
- Bind character to this skeleton (armature) and adjust skin weights.
- Set up control rig for animation
Prepare your Mesh
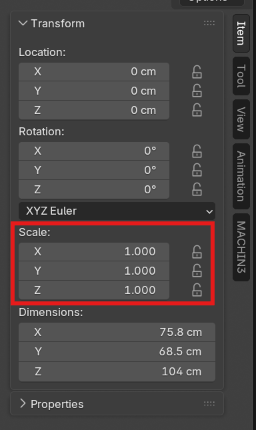
Each Scale axis of your mesh should have a value of 1.
The dimensions are the true size of your object and will be a proper representation of real world scale.
Ensure that the character is facing the -Y direction in Blender and compare it to other character models/scenes in the workshop project to get a sense of it’s scale. Often a character will feel smaller once it is in an idle pose, so consider this when checking your proportions.
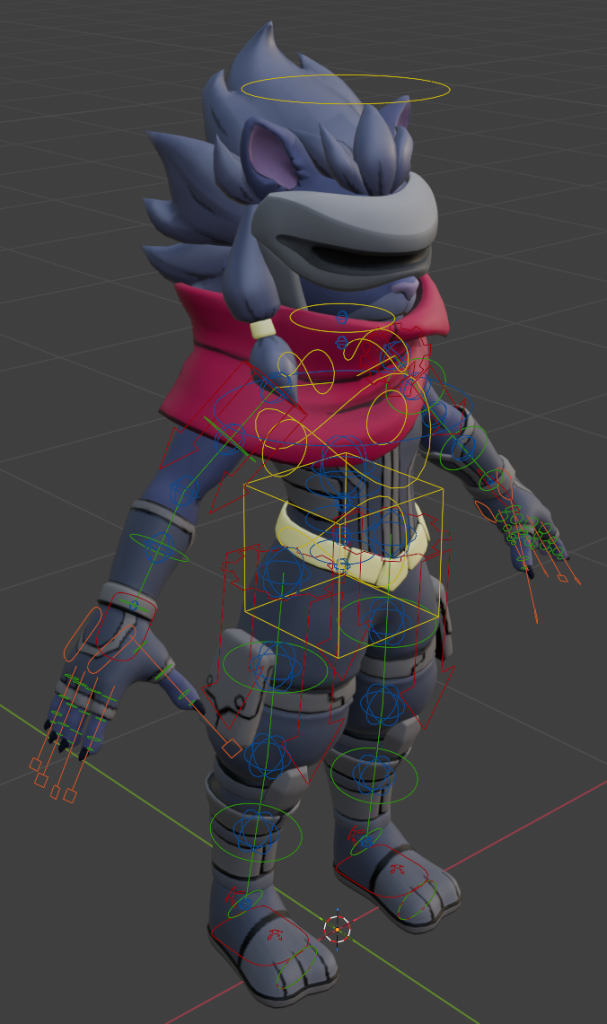
Before a character can be posed the geometry must be bound or “skinned” to a skeleton of joints called an armature. The armature is then connected to a series of animation controls called a “Rig”.
While it is possible to animate your character’s armature directly, it is highly recommended to instead build a control rig for your character, and animate using these controls.
Rigging is an advanced skill set that can be daunting to learn, however Blender plugins can help immensely with getting started quickly.
https://docs.blender.org/manual/en/2.81/addons/rigging/rigify.html
https://docs.blender.org/manual/en/latest/animation/index.html
https://dev.epicgames.com/documentation/unreal-engine/fbx-skeletal-mesh-pipeline-in-unreal-engine
Set up the Armature
Characters, mesh effects and articles are all authored facing down the front axis. (Maya +Z)(blender -Y)(Unreal +Y).
There are no strict limits to how many bones can be present in a skeletal mesh however it is important to be efficient and only use as many as needed to.
For reference Rivals of Aether 2 characters all have joint counts in the 120-200 range.
Also keep in mind that skinning influences are limited to 8 bones per vertex and skin weights with values less than 0.01 are removed on import to editor.
Hierarchy
A character’s skeleton can be named/structured however necessary as long as there is a single joint at the root. For best results when retargeting animation or matching other Rivals Characters it is recommended to follow a similar bone structure with the following joint hierarchy (optional bones marked in yellow:
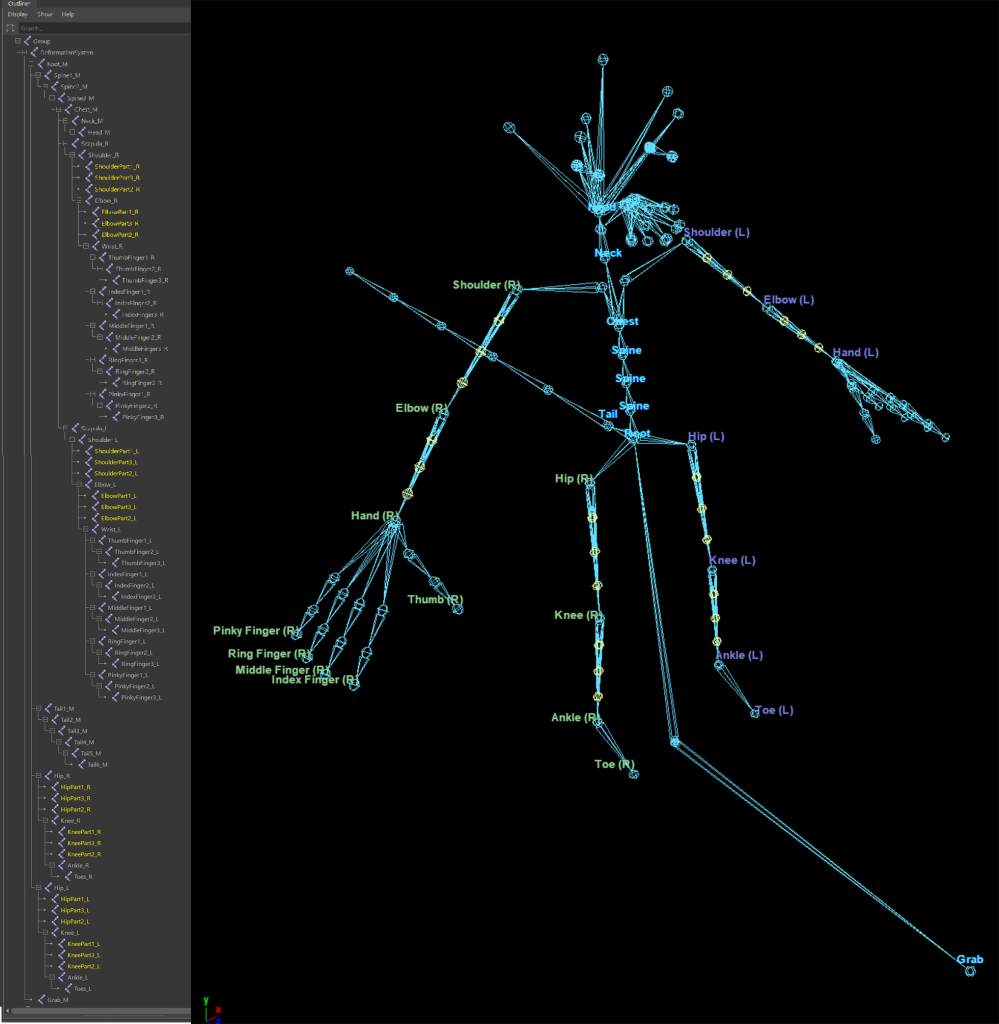
Additional limbs/features as well as sibling joints can be added at any point in this hierarchy, and existing limbs/extremities can be removed if not needed but the existing order of parent child relationships should be respected if animation retargeting is desired.
Animation-retargeting-in-unreal-engine.
Twist Bones
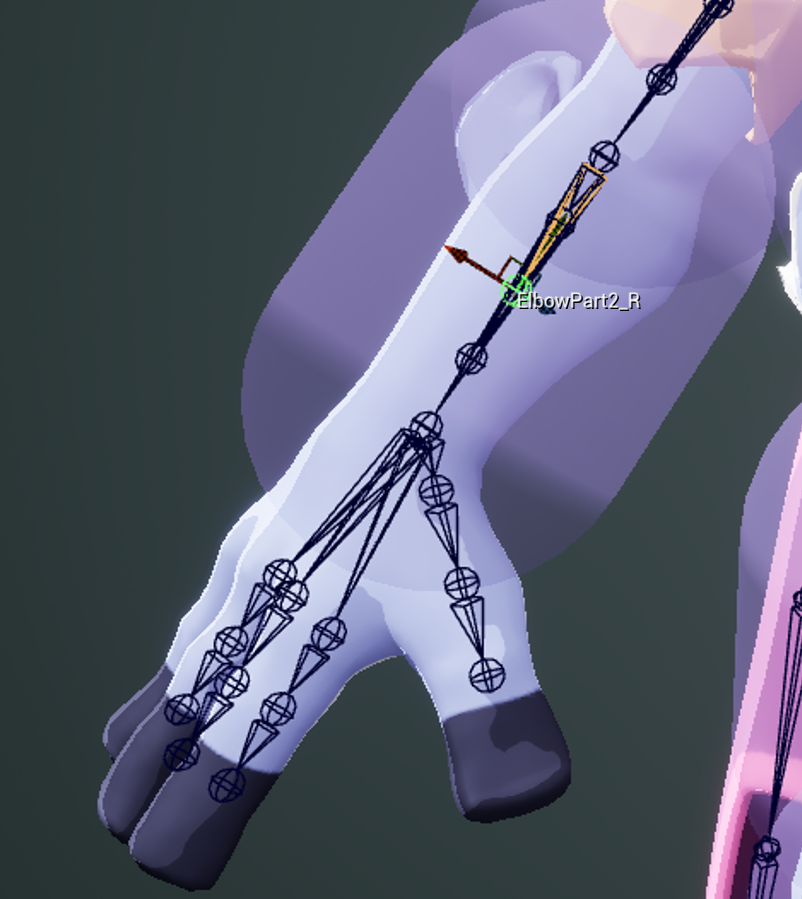
The optional joints listed (ShoulderPart_1-3,ElbowPart 1-3, HipPart1-3, KneePart_1-3) are twist joints, these exist on each character and allow for smoother twisting and bending of limbs, these are not necessary, however for characters that do make use of them, when setting up the Hurtbox Physics Asset be sure to mount capsules to joint closest to center between parent and child – in the case of the image above “ElbowPart2_R” in order to ensure accurate alignment with visuals.
Face Joints
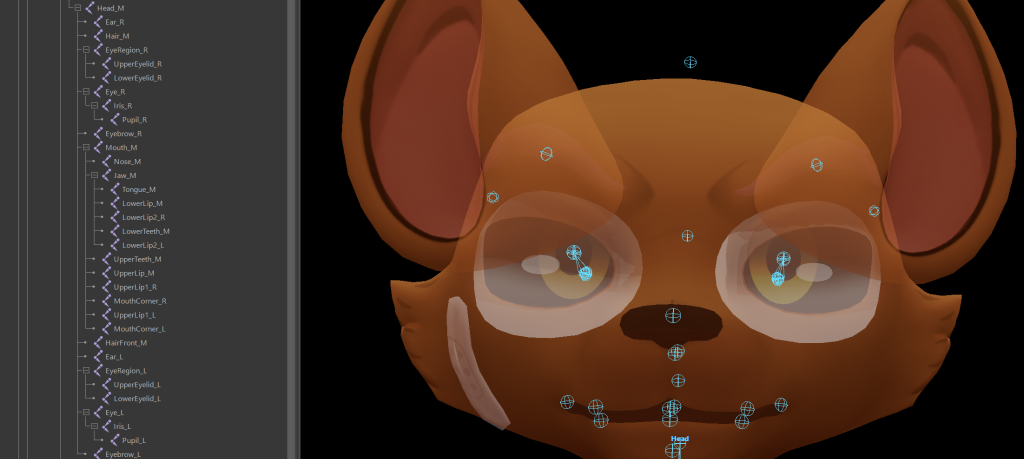
Face Joints can be laid out however necessary for the character in question. As with the body following the established structure will yield best results for retargeting from existing characters.
Grab Bone
ROA2 Characters use a grab bone to move their target during throw states. When a character is thrown the defender’s root position is attached to the attacker’s grab bone allowing the attacker to determine their position throughout. The name of this bones is arbitrary and any bone in your armature can be used. This will be explored more in depth in the Setting up a Throw document, however for now if you don’t have one add a bone for this purpose and give it a sensible name.
Notes on Joint Scale
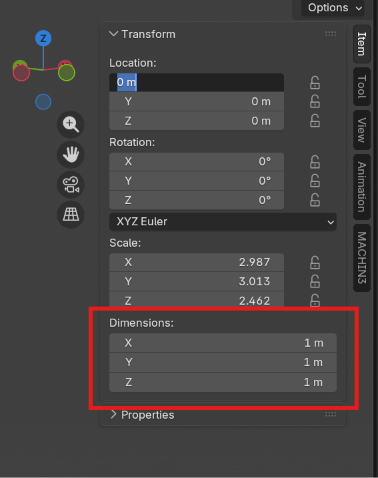
WARNING: Your joints should have a dimensions of 1 on each axis before exporting your character to unreal, you should apply any scale on your joints during the rigging process. Failure to apply scale at this stage can cause challenges later on involving animation adjustments.
In Maya, a hidden counter scale is set on child joints called “segment scale compensation” meant to keep child joints at a consistent size), this is discarded in unreal – a parent joint will always scale its children as well so keep this in mind when rigging and animating your character. Disable Segment scale compensation and counter scale manually if desired.
Unreal can only reliably scale joints non-uniformly (different scales per axis) if they are the last joint in a chain (no child joints parented below it)
Non-uniformly scaling a parent joint (Has other joints parented below it) will often give unexpected scale results on child joints in Unreal and is therefore not recommended.
This means that limb stretching should be handled with translation rather than non-uniform scaling (moving the elbow away from the shoulder rather than scaling the shoulder along its axis).
Paint Skin Weights
Painting skin weights is the method by which you tell each vertex which bones they should follow, this is called influence weight.
Each vertex can have influence from up to 8 Bones (The 8 Bone limitation is not present in Blender but is imposed once imported in Unreal, Unreal will strip the smallest influences above the 8 and redistribute their value to the remaining bones.)
Normalized weights means that no matter how you distribute the weight across various bones, they will always add up to the same value. What this means is you can never have a skinned vertex move more than the sum of it’s influence bone movement. If a vertex is fully weighted to a bone it will behave like a child to that bone, if it has equal weight across two bones it will get an average position between them.
Set Up the Control Rig
If you’re using Rigify, refer to the rigify documentation.